
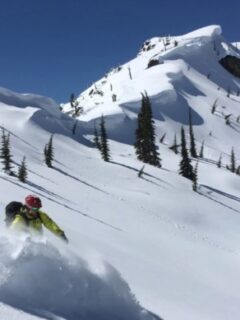
If you’re new to ski touring, getting started can be a little overwhelming. Where can I go ski touring? How does it work? What ski touring gear do I need? What are the best touring skis? Don’t worry, we’ve got you covered. We’ve been backcountry skiing for many years now. After completing various different ski touring expeditions, we have a strong understanding of the ski touring gear that is required.
In this article, I’ll outline the ski touring gear that you’ll need for single-day and multi-day trips. Additionally, I’ll present some of the best touring skis available, based on the terrain that you want to ski. All of the ski touring gear recommended in this article is equipment that we’ve used ourselves or has come highly recommended from experienced friends. There are also a few items that I’ve never used, but have done a ton of research. Enjoy!
The Basics of Ski Touring Gear
This could be a big list depending on single vs multi-day, terrain type, snow conditions, and weather. But to make things manageable, let’s start with the basics. I will make some suggestions from experience and research on products that might be worth looking into.
The Best Touring Skis
When it comes to determining the best touring skis, there’s a basic trade off that’s relatively simple to understand. You want lightweight touring skis for the ascent, but heavy skis for the descent. Light skis make the climb easier and faster since you’re moving less mass. However, if they’re too light you will likely sacrifice your control and power on the down. Some of the best touring skis have been designed to maintain downhill performance while minimizing weight for the uphill.
I rank skis as the number 2 most important gear out of boots, skis, and bindings. Boots are number 1 for me. Determining the best touring skis for you depends primarily on two things:
- The terrain you will be skiing
- Your skill and experience levels
You want the best touring skis specifically for what you are going to be doing!
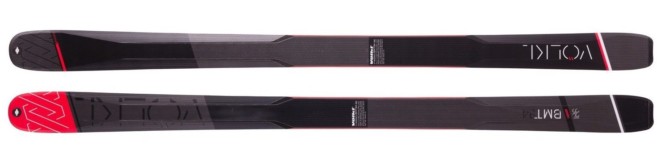
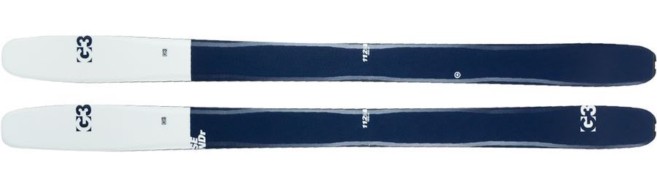
My current touring skis are the Volkl V-werks BMT 94. BMT stands for Big Mountain Touring, and they are in Volkl’s touring ski line. These are relatively light, but not so light that I won’t hate them on harder packed snow. They are a few years old now, but I’m still happy with them and the newer model of these continues to be one of the best touring skis available.
Best Touring Skis: The Trend Towards FAT Skis
All these numbers represent the underfoot width, in millimeters. As with regular skis, the wider the touring ski, the more flotation and fun in the pow pow. Recently, the trend with touring skis is FAT. If I were day touring in Canada or the western US, earning my turns for that great powder run, I would opt for one of these fatter options. That BMT109 would work just fine!
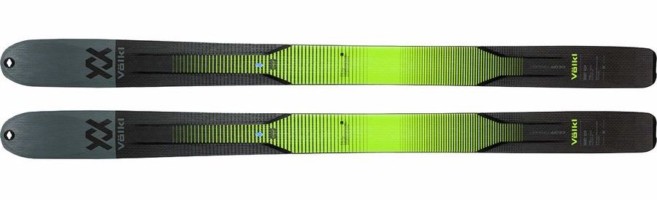
If, however, I was doing the Haute Route Trek in Europe, the new 90 is the way to go for me. Far lighter, no bumping edges as your sliding on the tracks, and less cumbersome on the kick turns you’re doing over and over.
My other two skiing partners – Lauren and Corey – use completely different brands of touring skis. Corey’s touring ski is a G3 Sendr 112, and he loves them. Definitely on the fatter end, they float amazingly well in the powder and can plow through anything. At the same time, they’ve been engineered in such a way that they are super light for a touring ski in this category. G3 is a very trustworthy brand as one of the leading producers of ski touring gear.
Lauren prefers her Black Crows, skiing their Atris Birdie at 108 underfoot. This is actually not one of their touring skis, but more of an all-mountain ski. However, she wanted something for shorter trips that were well-balanced and could do it all. She’s even used them for a few days inbounds as her resort ski. Their comparable touring ski is called the Corvus Freebird at 109 underfoot. But I don’t think the two are actually very different in weight…

The Verdict on Touring Skis
Determining the best touring ski for you really depends on how you want to use them. To summarize:
- Multi-day ski tours: light and relatively narrow touring skis is my opinion on this. The Volkl BMT 90 would be great, but most people will still go with fatter, in the US at least. Remember, you could be going uphill for 3-5 hours, so you don’t want lead weights on your feet!
- Day trips in the backcountry, skiing for the powder: touring skis that are 105 underfoot and up is great. However, lighter is better, so the Volkl BMT 109 would make a fine choice.
- I want a quiver of 1 ski, resort, and short Sidecountry, or maybe 1-day tours: 105 and up (for west coast skiing), light is not as great since you get more chatter in resort if they’re too light. Most ski companies put these in the FreeRide category. A Volkl 108 would meet those needs, or the Salomon QST 106. Those Atris Birdies for a women’s touring ski would also fit here. Sidecut helps more in resort carving those turns. Whereas if you’re in the backcountry, it can give you that hooky feeling if you’re on a crust layer. Been there before…
- I just want to Heli and CAT ski: well lucky you! In this case go 110 underfoot and above for the best touring skis. Plus, they don’t need to be light at all. My K2 Pon2oons at 132 fit the bill for big powder days.
- The last category is SKIMO: This is basically running uphill. In this case you want super skinny and super light touring skis. You really want all of your ski touring gear to be super light for this. Something like the Salomon MTN S/LAB MINIM would be a good option. These weigh half as much at least as the QST 106’s.
But the truth is that there are so many brands of touring skis out there. Even producers of regular downhill skis have jumped on the touring ski train. All of them have something that you would love to ski and tour on in my opinion. To discover what you really like, I’d suggest renting them for a day before buying.
Once you’ve determined the characteristics of the best touring ski for your specific application (see above), it’s all about finding ones that you can rely on. The best touring gear is often the gear that you know you can count on in any and all situations. A few sites that come to mind for ski touring gear research are Blister Gear Review, Outdoor Gear Lab, and Wild Snow.
Ski Touring Gear: Splitboards
If you’re a snowboarder that’s looking to get into ski touring, you’ve got two different options for your ski touring gear. First is to use snowshoes and carry your current downhill board on your back. But, if budget allows, the second option is the better option and that is to get some Splitboard gear.
There are two paths to a splitboard. One, lay down some cash on one of the many choices in the splitboard space. Or two, convert an existing snowboard you have using a DIY splitboard kit. Sounds scary, but it’s apparently not too hard! The most popular complete kit is the Voile Split Conversion Kit.
This is definitely a project, and yes, you have to cut your board in two! Here’s the Voile how-to video. One of my touring buds did this successfully, no fuss, no muss. It’s been a big upgrade for his ski touring gear to have a splitboard now instead of snowshoes. Not so fun riding with snowshoes strapped to your back! However, if you’re not ready to saw a snowboard in half, there are new, shiny already made ones ready to fit the bill.
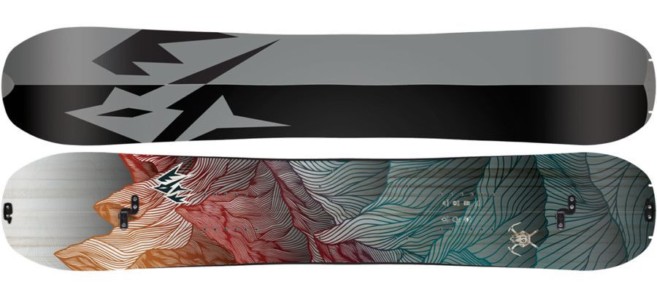
The best selling splitboard is the Jones Solution Splitboard. The Weston Backwoods splitboard also gets top reviews and is worth checking out.

Splitboard Bindings
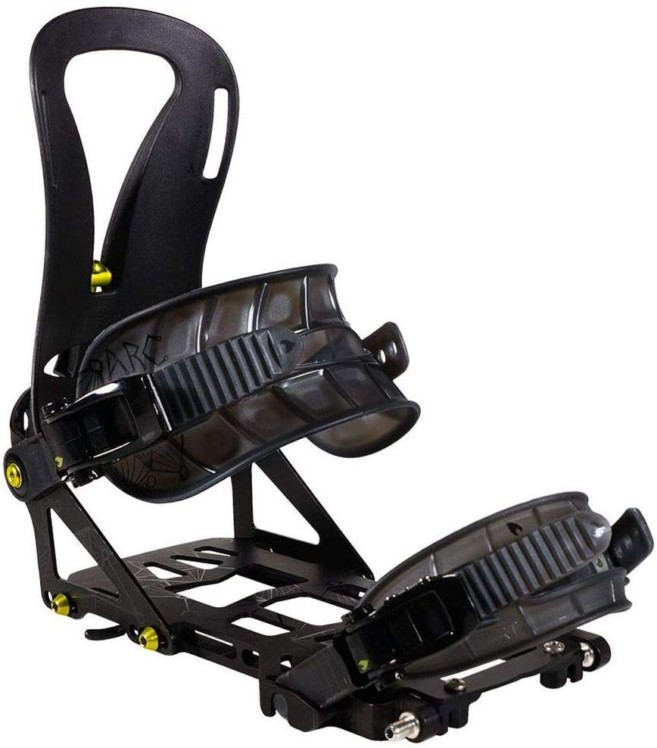
The D Arc Pro Binding is a well-liked touring binding for soft boot setups that attaches using the puck system. One other system that is quite popular is the Karakoram Prime-X Carbon which uses something called “active joining technology.” I like the CNC machining on the Karakoram’s, but it is a lot more expensive. I should add, Black Diamond is now in the splitboard game with their new BLACK DIAMOND X CARDIFF carbon Fiber $1200 board just announced Feb 2020. Also interesting.
Splitboard Boots
If you’re getting more serious with your splitboarding goals, you can get snowboard boots specifically designed for ski touring. Regular snowboard boots will work, but if you’re looking for the optimal touring experience, here are two models of splitboarding boots worth looking at.
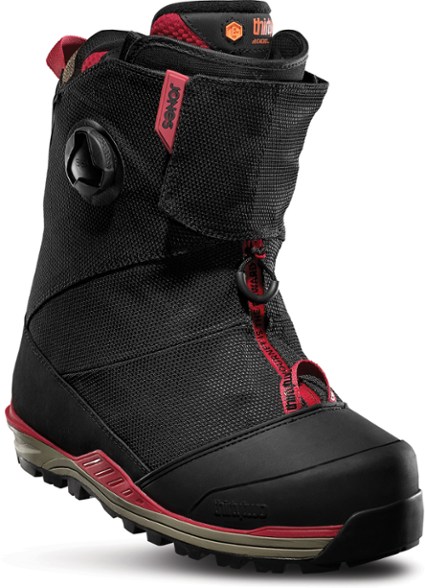
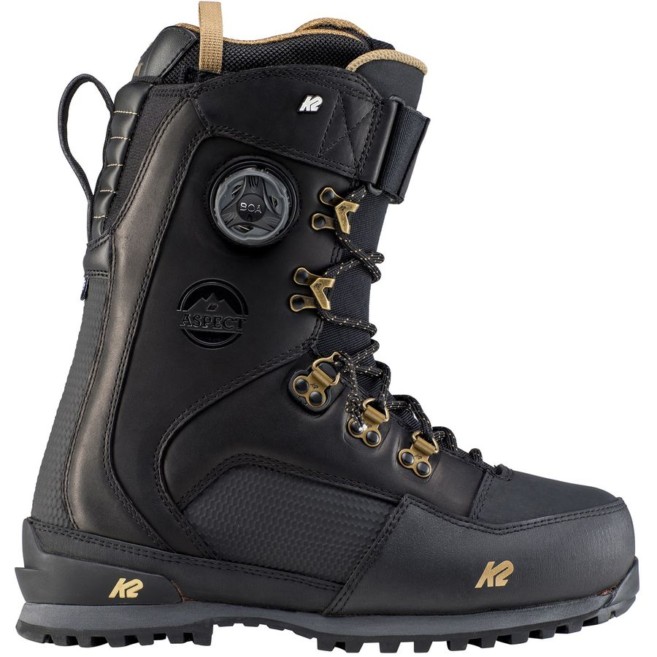
These are for if want something meant to help your stride on the up, and have the grip to hold you if you need to bootpack. First is the ThirtyTwo Jones MTB Snowboard Boot. It has a walk mode collar to allow for a longer more comfortable stride on the up, Vibram soles, and a full zip gator. Hard to beat the design for split boarding. One other option is the K2 Aspect Boa Snowboard Boot. It features a good Vibram sole that is crampon compatible and is super stiff.
Ski Touring Boots
In my opinion, boots are the most important piece of ski touring gear. A high-performance ski touring boot is one that is reliable, with good mobility for the way up, yet good stiffness for the way down.
Comfort is the key consideration here! Make sure you get comfortable boots or you’ll be unhappy when you start to feel blisters just an hour in to your tour. Pick the wrong boots and you might get bruised shins, cold feet, or horrible blisters. And if you’re on a longer ski tour, there’s no lodge to stop in and get hot cocoa while resting those weary feet! The key to getting boots is to find a great boot fitter, it’s a game changer!
So what makes a great touring boot? Well, somethings to look for include:
- Lightweight
- Strong flex (for the down)
- Pin (tech) binding compatible toe and heel
- Reliable grip base for climbing
- Good range of forward and backward range of motion for the skin up
- Forward lean angle (for the down)
- Comfortable, moldable liner and shell
- And a fail-proof, easy-to-activate walk mechanism
The Best Ski Touring Boots
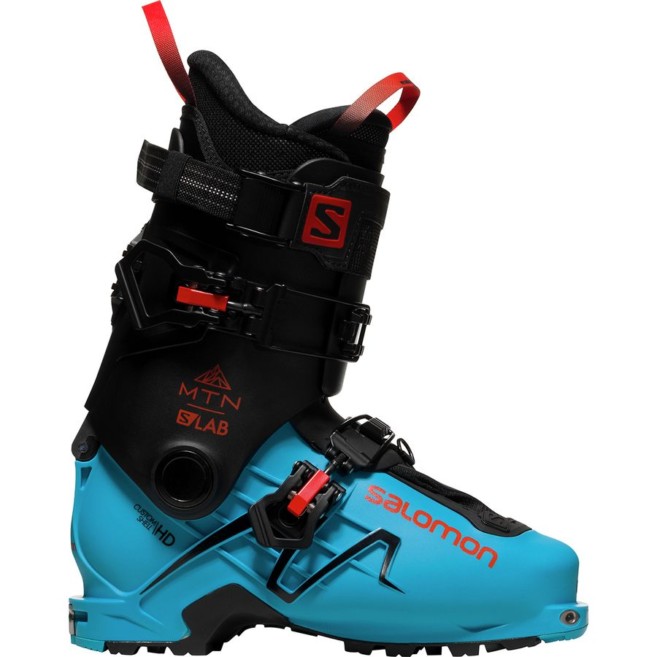
My current ski touring boot is the Salomon Mtn Lab boot from 2 seasons ago. The 2020 version has the same 120 stiffness and 2 buckle design. A great addition to your ski touring gear, the shell is now heat-moldable, better to widen that 98 last to a wider foot. Fitting mine required punching out the shell to accommodate my feet. Overall though, the flex, forward lean, range of motion, and walk mode system have been great.
Different brands use different last widths. I think my foot is better suited to a wider 100 last, but a good boot person can make a boot fit perfectly. Boot fitters are the real MVPs of the ski touring gear world!
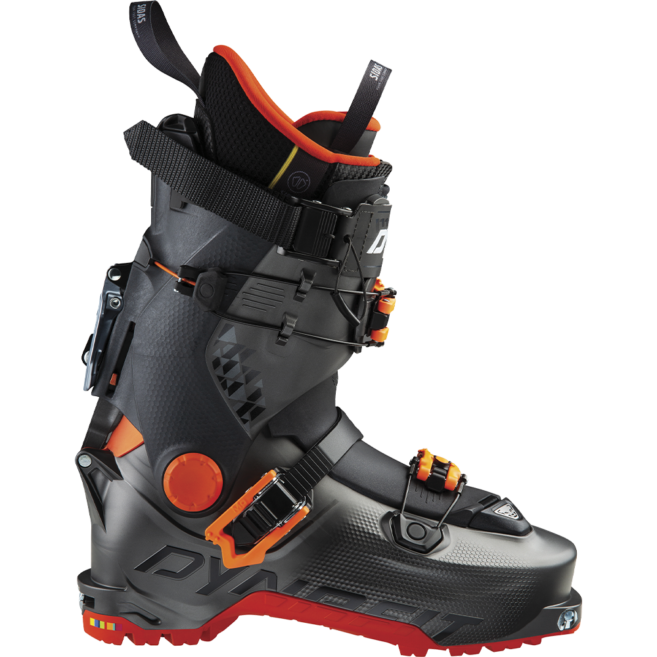
Here are the boots that I want to test out for a day, and see if the rave reviews line up. Dynafit – one of the original tech binding/boot manufacturers has a huge selection of ski touring gear. But the boot that looks most interesting to me is the Dynafit Hoji Free. It gets great reviews, has a 102 last (more volume for wider feet), a 130 flex for hard-charging, and an Alpine binding compatible sole. On top of that, it boasts 55 deg. range of motion, 1550 grams, and a 17 degree forward lean.
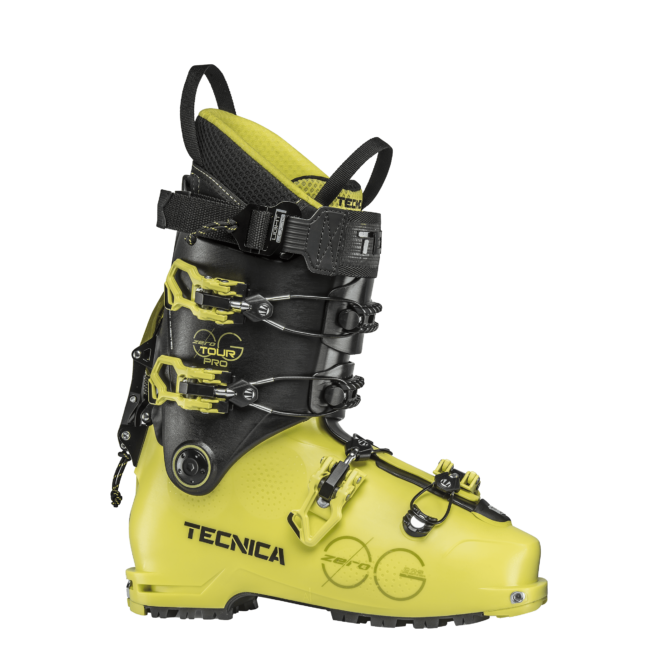
Another great ski touring boot is one from another ski touring gear veteran, Tecnica. The Tecnica Zero G Tour Pro Alpine Touring Boots are a particularly enticing pair of boots. They feature a 99 mm last, 130 flex, with 55 deg. range of motion. At just 1315 grams, with 13 deg. forward lean and MNC (multi norm certified) binding compatibility, they’re a great high-end option.
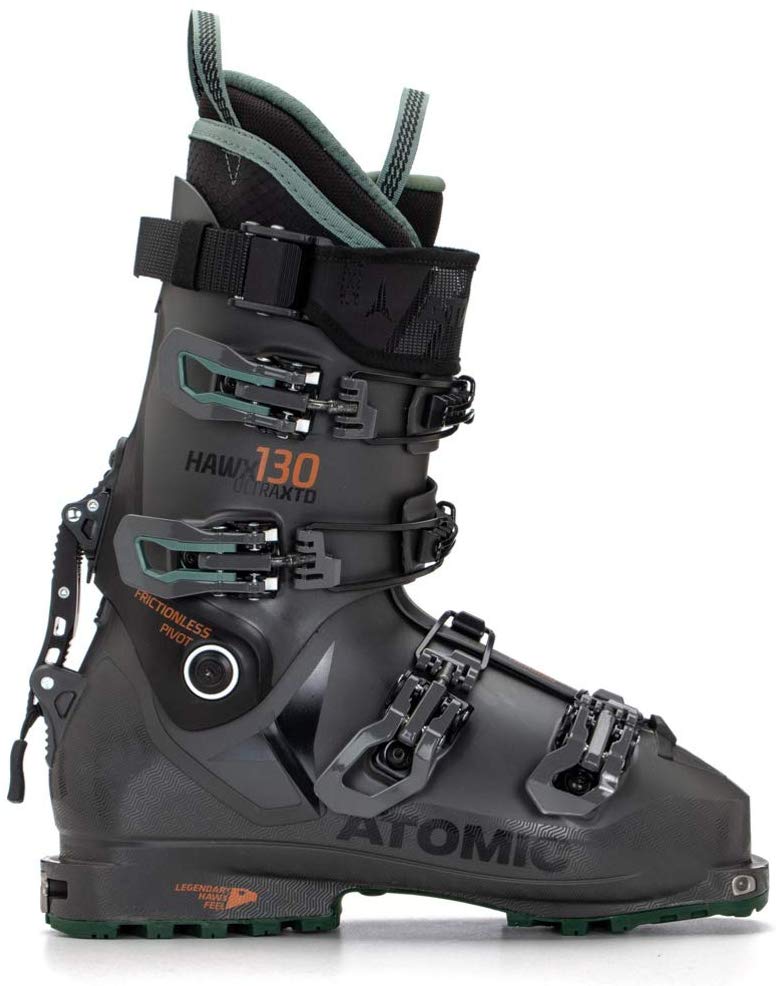
he last ski touring boot model on my list right now is from Atomic. Specifically, it’s the Atomic ULTRA Hawx XTD 130. 130 flex, 98 mm last, 54 deg. range of motion, 1430 gms and 15-17 deg of forward lean, and also MNC binding compatibility. A super lightweight yet stiff enough option!
The One Boot Quiver
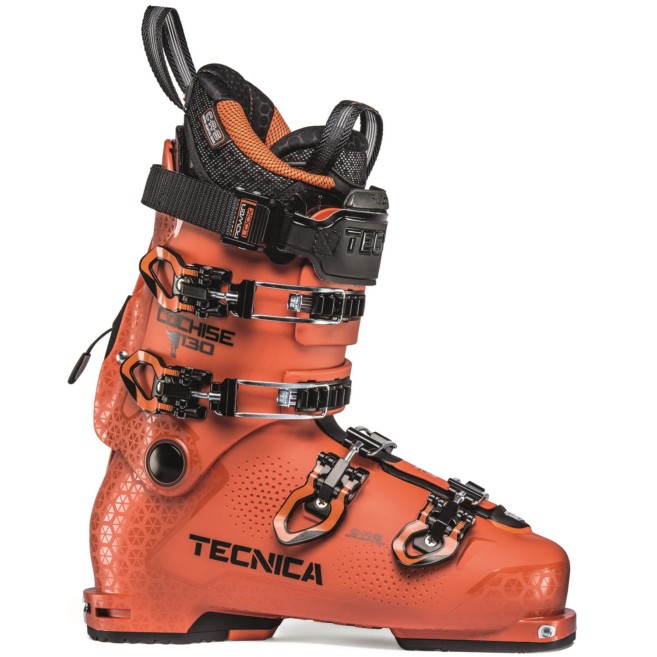
A lot of the manufacturers are pushing a one boot quiver design. The idea is that you have one boot that you can use with your regular downhill skis, but also holds its own as a touring boot. Both my daughter and her fiance ski the Tecnica Cochise. Not the lightest for going up, but it’s comfy, offers a decent touring mode, and it won’t hold you back in the resort.
So what are the specs on that boot? 130 flex, 99 mm last 12.5 deg of forward lean, 1950 gms and alpine binding compatible – even has switchable sole options. You can see you’re carrying maybe 600 gms (1.3 pounds) more for each of your feet up the hill. But what you get is a smooth flexing real 130 stiffness. There are too many others in this category to cover in this article.
Buying ski touring gear all at once can be expensive. Therefore, a one boot quiver like the Cochise is a great way to get a piece of gear that is usable both inside and outside of the resort. It’s a great ski touring gear hack!
Ski Touring Boots: The Verdict
Besides avalanche safety gear, boots are the most important part of your ski touring gear. Like skis, the type of ski touring boot you get really depends on how you want to use them. It’s all about uphill weight vs downhill performance. You’re putting a value on which of those is most important. Also, do I want to use these boots with non pin bindings.
- I want a dedicated touring boot that’s light but skis well: The Salomon Mtn Lab boot fits this category well.
- I want a 1 boot quiver, where I’m maybe 70/30 resort/touring, so what if it’s heavier: The Tecnica Cochise is a good choice here.
- I want the lightest of the light – skiing down be damned: I should just tell you what Killian Jornet uses when he wants to go fast and light – the Gignoux Race Pro. All carbon, 600 Grams per boot, WHAT!
The Best Poles for Ski Touring
While poles aren’t necessarily the important piece of ski touring gear, they definitely make a big difference! Poles are needed going up for balance, and to help negotiate those kick turns. You want a pole that won’t break on you during a long ski tour, is lightweight, and is collapsible for climbs where you need your hands.
My current pole is the Salomon Mtn Lab S3 2 piece carbon fiber pole. They weigh 539 gms for the pair for low swing weight. Additionally, they have a pivot basket that works well on steep terrain, along with a safety strap with an adjustable pull out. I also like the extended rubber grip to help adjust traversing steeper terrain.

Important safety tip: Keep those straps off in the trees, or make sure you have breakaway straps. If you find yourself in risky terrain – avalanche or tree well terrain – you want to be able to eject your poles if you ever got into trouble.
I have one more pair of poles that are a classic piece of ski touring gear. The Black Diamond Traverse. They have multiple length options available, and there is also a pro version of this. There’s even one with a whippet to help arrest you on crazy steep terrain. For me, these poles are also a great option for when I go cross country skiing!

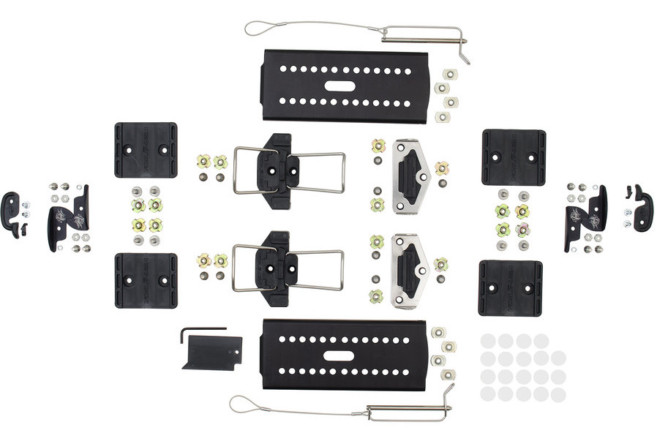
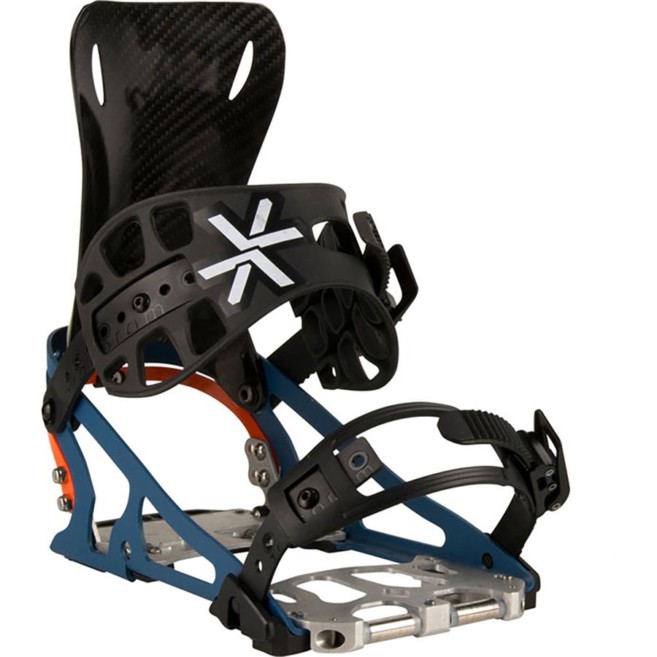
The Best Bindings for Ski Touring
So what do you want in a ski touring binding? Well, some of the features and characteristics include:
- Lightweight
- Trustworthy retention
- Easy switchover from ski mode to walk mode
- A safe binding that will release when you need it to
- Some elasticity in the bindings
There are two types of ski touring bindings, Frame and Tech. Frame is something like the Marker Baron. I have a pair that I let friends borrow if they don’t have gear. They’re big and heavy (2780 gm pair) and great on the downhill, like a normal Alpine binding. But on the up, you have lots of weight. Plus, the way they hinge is not at all the same feeling as the tech pin bindings.
Tech bindings have two sharp pins in the toe. These two pins insert into pin inserts on boots that have them, creating a fulcrum point so that you can raise your heel and climb. The heel systems were traditionally different. But now there are hybrid Tech, like the maker kingpin, that has a Tech toe, but conventional alpine heel.
I tour on the Marker Kingpin and I really like them. They had some problems early on with some design issues, but I think they’ve gotten past that. I love the lift assist mechanism. It makes it super easy to switch climb angles with the pole. Another great feature is that they are DIN Certified and I can ski hardpack with them if I need to. I have, however, had some problems in spring conditions with ice buildup under the toe piece. When you get in this situation you almost need something about the size of a coat hanger to clear it out. Can be annoying!
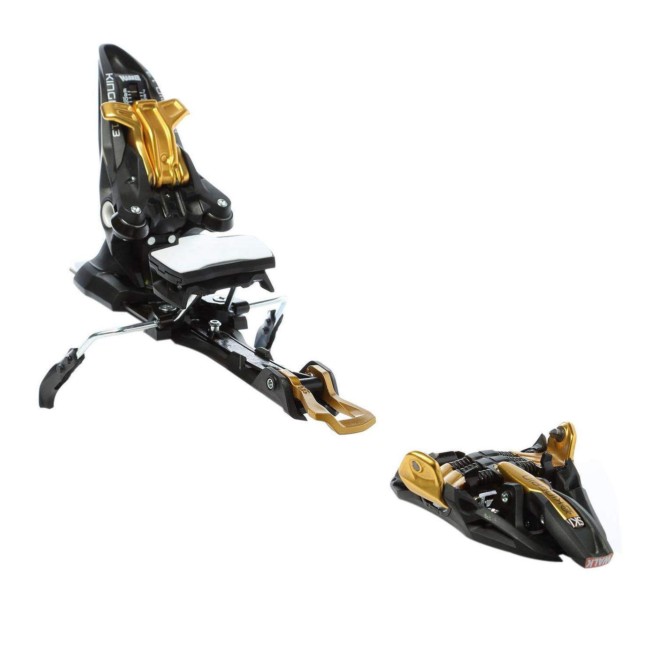
Marker for 2020 announced a Lighter Kingpin – the M-Werks version.
Leashes or Brakes?
I use brakes, but you don’t want to lose that expensive ski in the backcountry if it comes off and keeps sliding under the powder snow. A leash does solve this issue, but it makes it harder to take skis on and off and is more dangerous on hard snow. Plus, if you’re caught in an avalanche the consensus is to lose the skis and poles. Therefore leashes can be a dangerous option in avalanche terrain.
Ski Touring Bindings: More Options
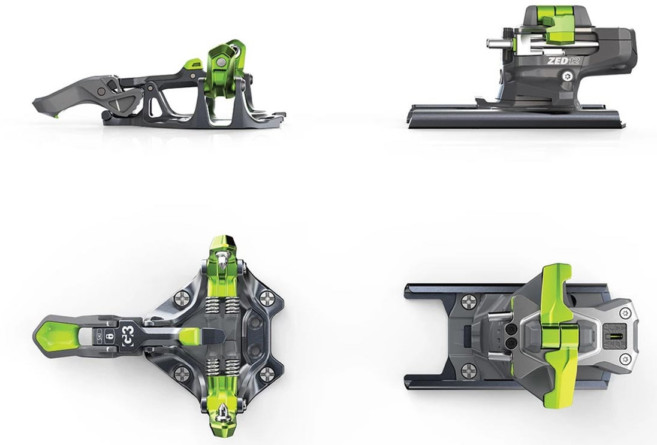
G3 makes some great ski touring bindings, and two of my ski partners ski their gear. One being the G3 Zed bindings</span></a><span style=”font-weight: 400;”>, the other being the G3 Ion Bindings. These are both recognized across the ski touring gear world as great options. Only issue I’ve seen is that it’s a bit of effort to switch the Zed brakes from walk to ski mode. Other than that, both great options!

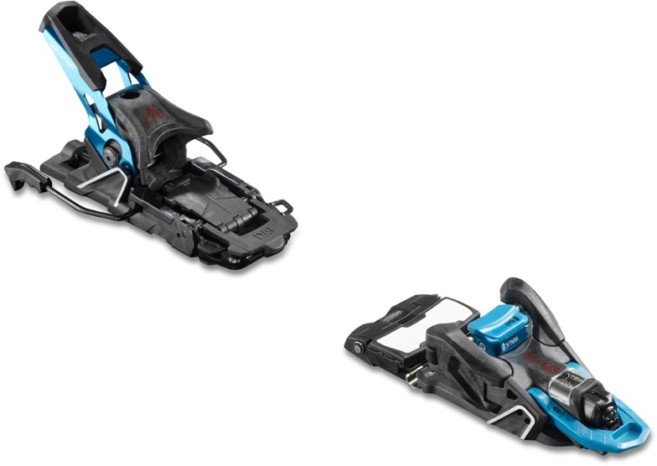
Lastly, I’ll briefly mention the new category of the truly 1 binding quiver which right now the title goes to the Salomon Shift. This is not a touring only binding. I would call it a great alpine downhill binding, with a great transition to Sidecountry touring, or a day tour on its own. Trust me, during long touring days and lots of uphill laps you feel the weight from moving those feet with lead weights on them.
Ski Touring Bindings: The Verdict
As with the skis and boots, you have to make a decision on what’s important to you in a ski touring binding. Here’s a way to weigh those values:
- I want a dedicated touring binding, that I might use sometimes in the resort. The Marker Kingpin M-Werks is a great choice, these are pretty light for what they offer.
- I want a touring dedicated lightweight binding. G3 Zed bindings are a solid, reliable option in this category.
- I want to mainly ski in the resort, but sometimes hit a sidecountry run.Meet the Salomon Shift.
- I want to be Kilian Jornet, and go up fast. The Atomic Backland Tour is pretty minimalist and will have you flying up the mountain!
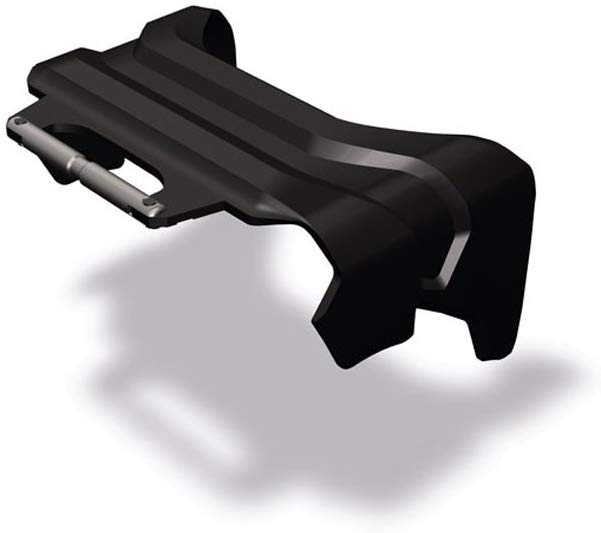
There’s one last thing you will need if touring on icy steep conditions. That is a binding specific, and ski width-sized crampon. It’s a bit scary when your skins don’t hold you and you start sliding backward on a steep slope! So crampons are a solid addition to your ski touring gear. Here are the ones for the Marker Kingpins.
Touring Skins
The next piece of ski touring gear that you’ll need is a good pair of skins. Skins are what keeps your ski or board gliding forward, but not sliding backward! As mentioned earlier, they are made with combinations of nylon and mohair. Different mixture ratios have an impact on glide speed vs. holding power.
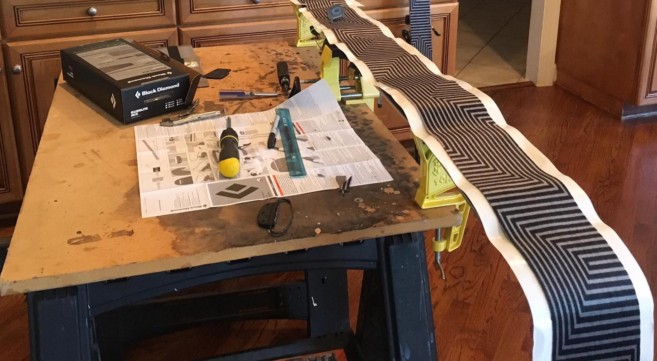
To determine the best ski touring skins, I generally start with the choice of skins that are made for my skis by the manufacturer. This is useful if your skis have a hole in the front, for example, that is part of the built-in retention system for the skins. Here are the ones for the Volkl BMT 109 skins.
Don’t use Volkl’s vacuum skins (which have no glue on them). I used them, sounded like a great idea but they just didn’t cut it. If you get some moisture between the skis and skins – watch out. Stick to the traditional glue style skins for now!
The other option is to buy “generic” skins that are made for your approximate ski size. You then cut them to the right size for your touring skis using a simple supplied razor tool that they show you how to use. One good choice here is the Black Diamond Glidelite Max STS. I’ve cut a pair of these for my daughter’s skis and she likes them.
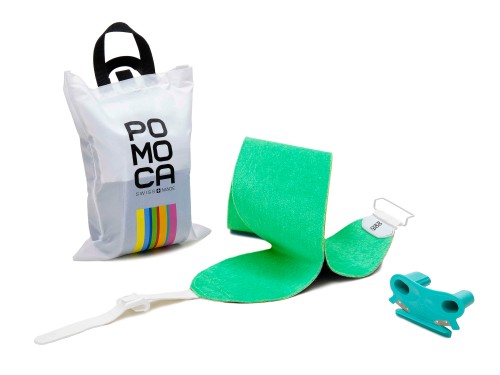
Pomoca makes great skins as well, like the Climb Pro – S. But I would use their guide to find what’s best for the conditions you’ll be in.
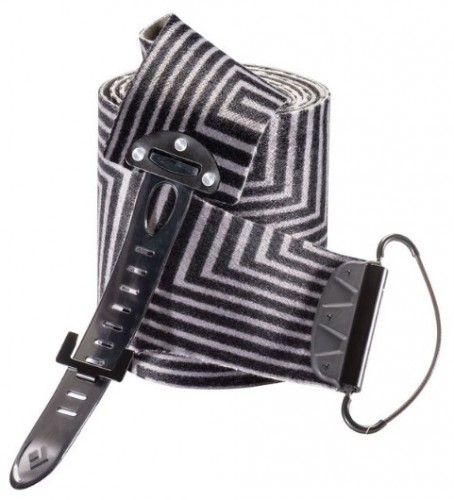
Looking to yet another brand, G3 has a great set of skins in the Alpinist + series. They have different mohair/nylon mix depending on the conditions you’ll encounter. The G3 Alpinist + Glide above are the best all-around skins with their balance of grip, glide, and durability. The plastic portion near the top of the ski makes them easy to fold over and shove in your pockets. A great addition to your ski touring gear!
Ski Touring Safety Gear
This is what could be part of the “save someone’s life system” you need to have when going in the backcountry. Shovel, Probe, Beacon, partner – the necessary items. These are the most important pieces of ski touring gear. Never leave home without them.
Backcountry Essential #1: Shovel
When it comes to your shovel, first and foremost you want something that can move a lot of snow, quickly. You also want something sturdy that will fit easily in your backpack, and is easily assembled. Things like handle length, the size of the shovel head, and handle type all have an impact on functionality.
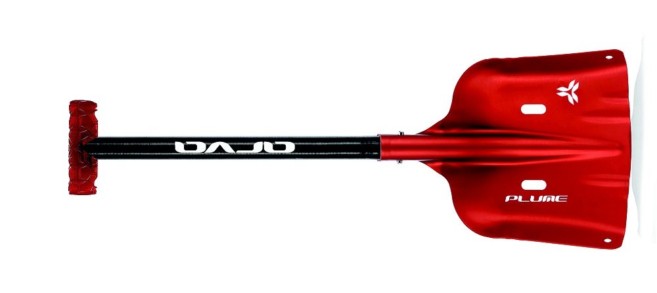
I have two shovels. One for long epic journeys where weight is a major consideration, that shovel is the Arva Plume. It’s crazy light with a carbon fibre handle but is still functional.
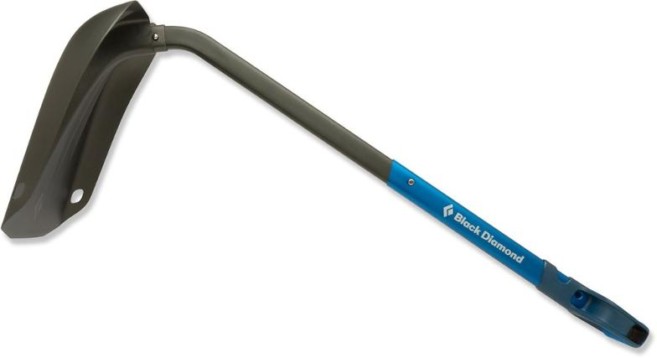
For my daily ski touring gear, the shovel I use is the Black Diamond Evac 7. This is a great all around shovel for ski touring. Dig test pits with it, make jumps with it, dig out a snowmobile, and move snow away fast from a buried victim. What’s super cool about this shovel is you can configure it in different ways to aid your digging style. Very well designed. I like the handle grip also.
As with any of your Avalanche safety gear, you and your partners need to be familiar with how they work, and practice, practice, practice!
Backcountry Safety Essential #2: Beacon
The avalanche beacon is the tool that helps you locate someone in an avalanche debris field if you have no visual confirmation of where they are. This is a critical piece of ski touring gear that you need to practice a lot with. Most ski areas have buried signal transmitters that they move around on certain runs that you can practice with. Be sure to give these a try. I will also add, make sure your touring partners are as proficient as you are. Because that’s who’s going to have to find you in an avalanche!
Always turn on and test your beacons with your partners before you take your first steps on a trip. DO NOT EVER turn your beacon off during a trip because you “want to save battery” or something like that. Always follow the rule “Turn it on at the car and turn it off at the bar.”
It’s important to note that all beacons are compatible with one another. The one thing you need to remember is to TURN YOUR BEACON TO TRANSMIT as soon as you put it on, and if you’re looking for people in an avalanche, everyone in your group needs to TURN IT TO RECEIVE. Or else you will be sending a false signal that will lead other rescuers astray.
I happen to use the Arva Neo beacon. It’s easy to use, has a clean and intuitive design, and has a triple antenna design with great range. If you have a beacon that is over 10 years old, it’s probably time to get a new one!
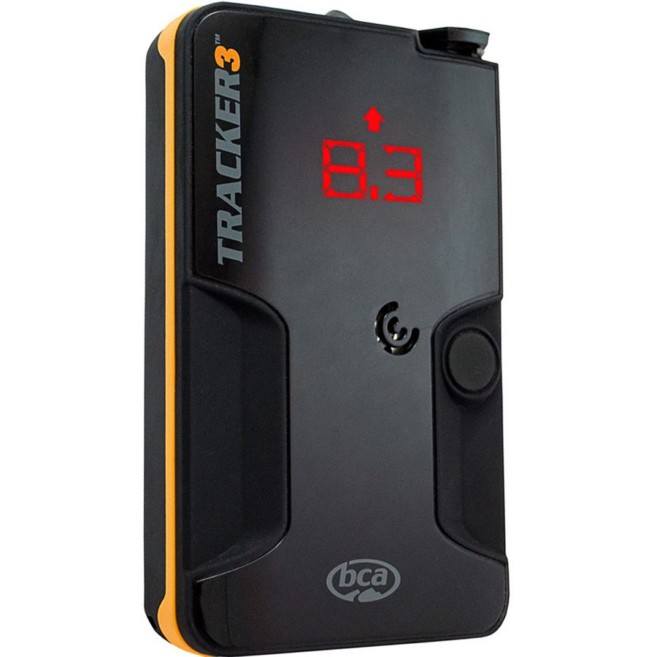
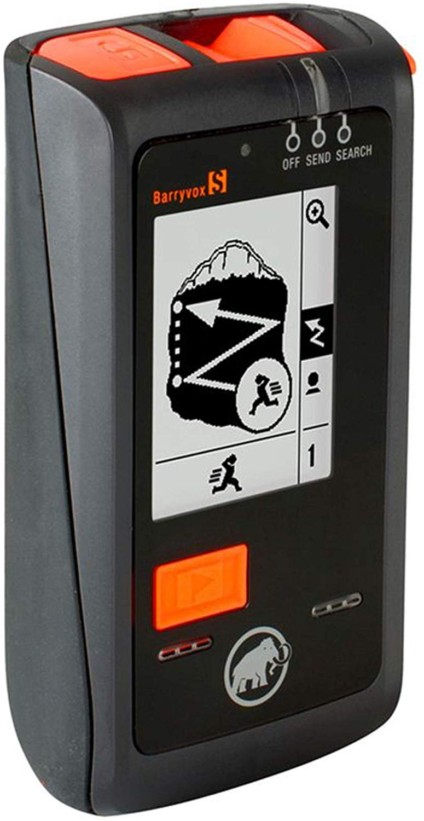
Two other very popular avalanche beacons are the BCA (Back Country Access) Tracker 3 and the Mammut Barryvox S Beacon (which is the pricier of the two). Take a look at their interfaces, make sure you’re comfortable with how they work – either of these would be great.
Backcountry Safety Essential #3: Probe
The avalanche probe is a long (~10 feet) collapsible pole (aluminum or carbon). It allows you to “probe” the snowpack once you have gotten as close as you can to an avalanche victim with your beacon. You start probing in a spiraling pattern from your beacon location, and once you find your victim, dig, dig, and don’t stop digging.
You want your probe to be easy to deployed once you get the folded version out of your pack. You don’t want crazy weight, and you want reliability – not something that will break when you need it.
For avalanche probes, again I have a few I use (when friends are in town I let them borrow the one I don’t need). For long tours where I’m staying light, I use a Black Diamond Carbon Quick Draw 320, at 342 grams.
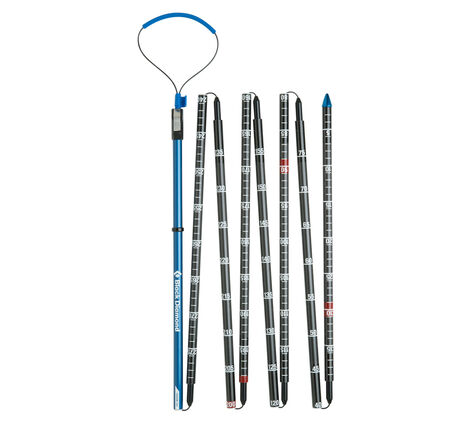
My secondary probe that’s Aluminum is a Black Diamond QuickDraw Guide Probe 300. That particular length is not available anymore, now it’s the Black Diamond Quickdraw Probe 320. This looks like the Carbon one, except the main pole is red, and this weighs 385 gms.
I like the QuickDraw Deployment on the BD probes. It works well – you sort of hold onto the small handle, and throw the rest away from you holding the main colored first pole, then pull the handle to bring them all together. It’s well designed. You do need to make sure you pick one long enough for the snowpack of the area you will be in, 320 is about the longest. I would not buy a probe shorter than 300cm (3 meters).
Ski Touring Helmets
Should you wear a helmet in the backcountry? Yes, but maybe not when climbing on mellow terrain with no avalanche danger, and no risk of falling or being hit by rocks. When these are the conditions on a warmer day, I strap my helmet to my pack and off I go. Skiing down, my helmet is always on, and yours should be too!
Buying a dedicated ski touring helmet is not an essential. You can definitely get away with using your usual downhill skiing helmet. However, if weight is a big concern for you, it could be a worthy investment.
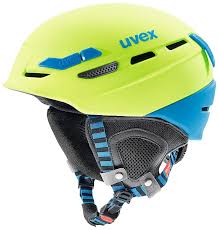
The helmet I currently use for touring is a relatively lightweight tour specific helmet – the UVEX P8000. I think they’ve discontinued my super cool orange color, but I like the Lime Blue Matte. I like the helmet, it gets the job done, and the colors suit me! It has reasonable ventilation, and yet it adds warmth on a cool day.
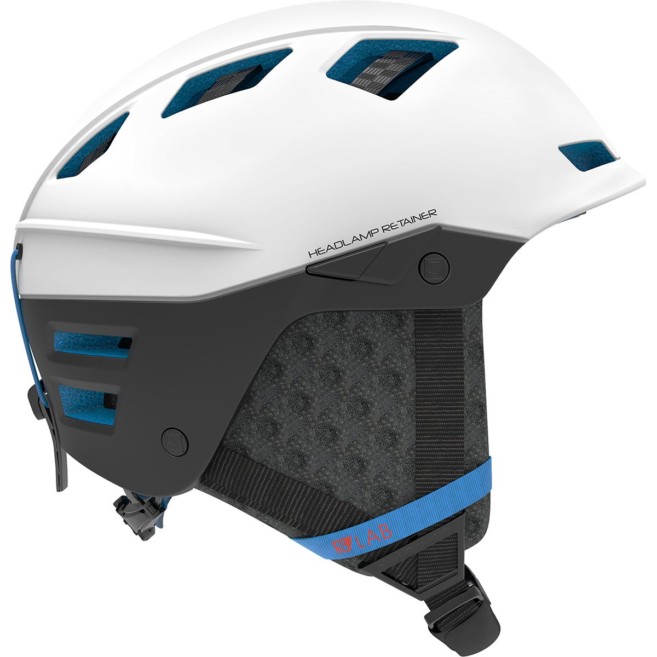
Another helmet I like for ski touring is the Salomon Mtn Lab helmet. One of my friends on the Haute Route used it, and it worked well.
Touring helmets are minimalist, which means no advanced MIPS protection, as that would add a bunch of weight, unfortunately. There are far lighter helmets like the Black Diamond Vapor helmet (198 gms) and the crazy light Petzl Sirocco Helmet (170 gms). These last two could almost be rock climbing helmets, super minimalist!
Avalanche Airbag Backpacks
If you’re doing some steep lines, you may want to look into adding an avalanche airbag to your ski touring gear setup. This is separate from a backpack, which is a requirement on a tour. But an airbag backpack is an optional piece of safety gear. What is it, well it’s a backpack that has this big bag that fills up when you pull a handle for deployment.
I currently do not have an airbag but I am seriously thinking about getting one. An analogy of how airbags work goes like this – if you shake a bag of potato chips, the large chips rise to the surface, and the small ones settle. The more volume in the airbag, the bigger you are, and the more you will hopefully stay on top of a slide. There is also some head and neck protection offered sliding through trees, etc…
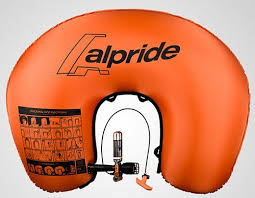
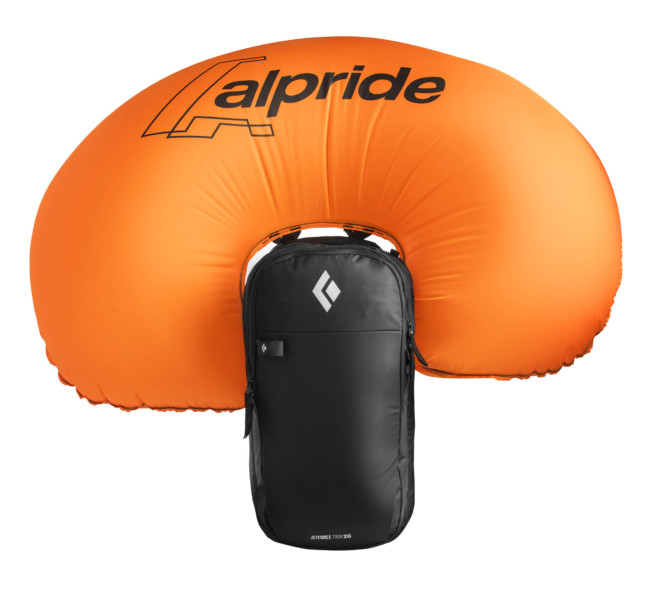
I could write a long blog just on this topic, but for me right now, the technology of choice here is the Aplride E1 Supercapacitor system. A game-changer in my opinion. It’s USB rechargeable in the field, allows for multiple deployments in the field, no canisters to refill, good in cold temps (we’re not skiing in Miami), and easy to travel with on an airplane.
This Swiss company (Alpride) has licensed its technology to a few companies for now. That means that you can now find this system used in the Black Diamond JetForce Tour 26 as well as the Scott BackCountry Patrol 30.
Osprey – the backpack company is getting into the game as well. They announced at Outdoor Retailer 2020 two ALPRIDE based packs. The womens Osprey Sopris Pro 30 / and mens Soelden Pro 32. Interested in learning more about these options.
So what’s holding me back on an Airbag?
They’re not cheap, but the prices are coming down, and if it saves your life, what’s that worth? Will it give you a false sense of security? For me I don’t think so, I’m very conservative with my terrain choices, but for some, I think this can be a problem.
Ski Touring Clothing
There’s nothing worse than being cold and wet on a backcountry ski tour. Clothing is the key to your success, along with a proper layering system to manage your temperature.
As with other winter aerobic activities such as running, and cross country skiing, you have two choices of how you start. The first approach is all bundled up against the cold, you start moving, and will soon find that you will have to remove layers and stow them away in your pack since you’re too hot. The second approach, and the one I choose, is to start colder, with a midlayer and your jacket, no big insulating layers. As you get going you will warm up to a comfortable temperature.
Depending on the time of year, you can really heat up on the skin up, I mean really. On a spring day, you could really be sweating, so efficient ways to dump that heat through pit zips, and vents in pants and jackets are key! In terms of materials, cotton is out, always. You need synthetics for the base and midlayers to wick sweat away. Down is also not great when you’re sweating, synthetic insulation is way better.
Jackets for Ski Touring
There are a million choices, but I’ll start with what I use. Outdoor Research is one awesome company. They offer great products, at reasonable price points for backcountry ski touring clothing. The main jacket I wear touring is the OR Trailbreaker jacket, which unfortunately, OR doesn’t make anymore. It’s light, softshell, well-ventilated, has Pertex waterproof coating on shoulders and hood, so not a completely waterproof jacket by any means.
If it’s pouring rain, which sometimes happens at the start of a tour, the layer I throw on is the OR Helium HD. It’s light, I can throw it on quickly in an emergency, and it’s easy to stuff in my pack. It’s not super breathable though, but I knew that getting it. Breathability and waterproofness are a bit of a trade off.
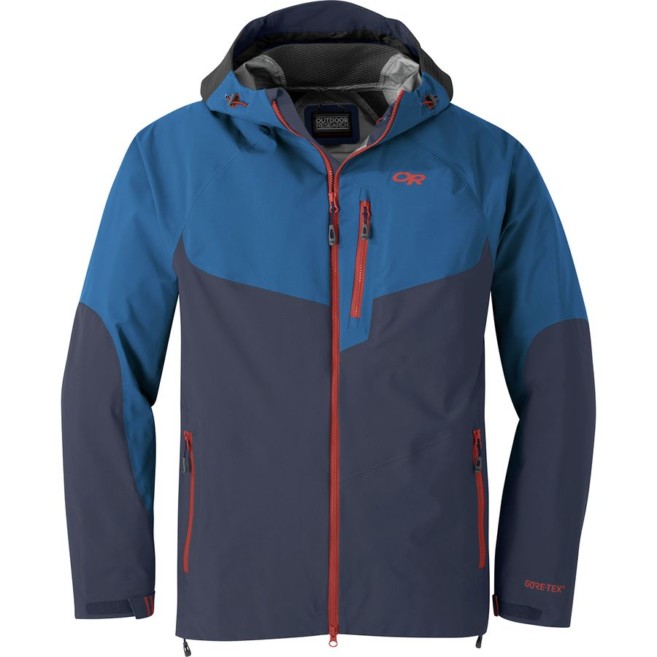
If I were looking at a new jacket from OR right now, it would have to be the Outdoor Research Hemisphere Jacket. Gore-Tex, great styling, well vented, yep, nice! Gore-Tex makes a big difference, but it undoubtedly drives the price up.
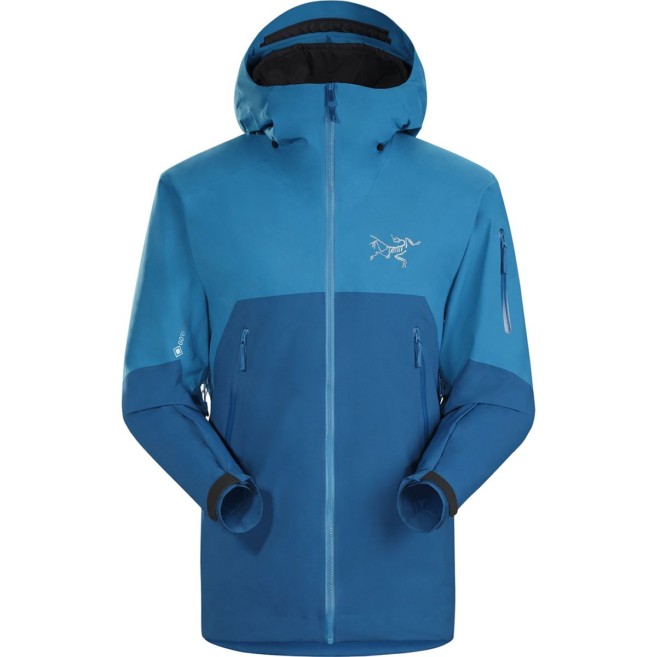
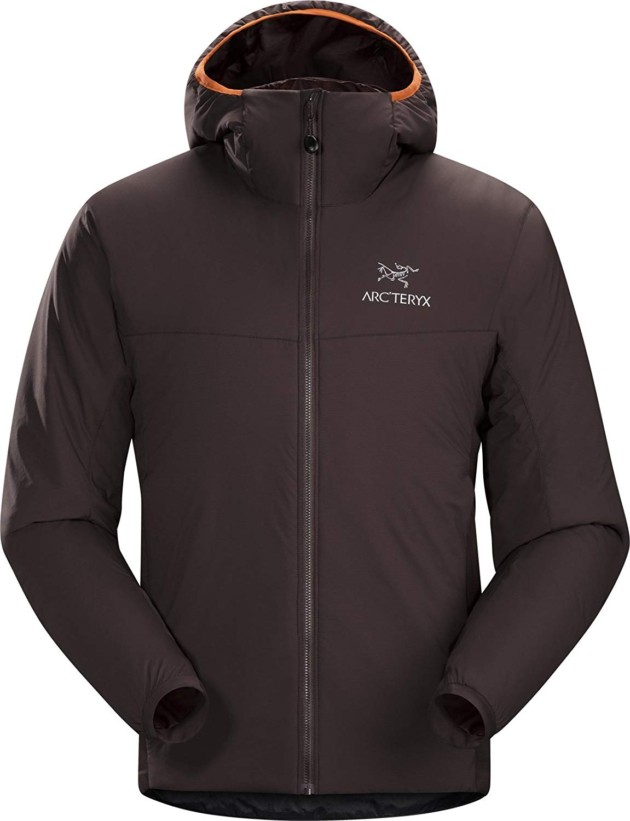
I do have a GoreTex shell that I will sometimes use depending on weather predictions. My main one is the Arcteryx Rush jacket, which I’ll admit is a crazy expensive jacket. Find it on sale. You can definitely score a 25% discount off of retail if you shop around and buy at the right time – I was able to. I use this mainly for my inbounds skiing, but it sometimes goes on a tour with me. Super well made.
Base and Midlayers
This has to be a great wicking material, and one that has worked well for me is the Capilene products from Patagonia. They’re super functional. I’ll usually have a Capilene tshirt, followed by a ¼ zip Capilene mid weight long sleeve shirt. Great combo and I can go for a week and they seem to resist smelling for a bit longer.
Insulating Layers
Lastly, my warming insulating layer that I throw where it’s freezing cold and the wind is blowing is the Arcteryx Atom LT Hoody. So many color choices, you can usually find it on sale somewhere, and it is SOOO functional. It’s light, compressible, and synthetic insulation (no concerns about it getting wet). The hoody is also pretty darn windproof, has good venting on the sides, and has a hood, naturally. It is one of my favorite jackets for sure. And if you’re sweating and put it on, no big deal, synthetic, not down!!
Another one I would consider is certainly a long-time classic, it’s the Patagonia MicroPuff Hoody. This is also synthetic insulation with Primaloft. Light, compressible, great looks.
I do try to buy local, so another plug for our local Sandpoint Idaho ski shop that does carry the Arcteryx line, and knows their touring gear – The Alpine Shop – for which I have no affiliation at all other than having gotten great gear at fair prices in the past. Their boot fitting is exceptional!
Pants for Ski Touring
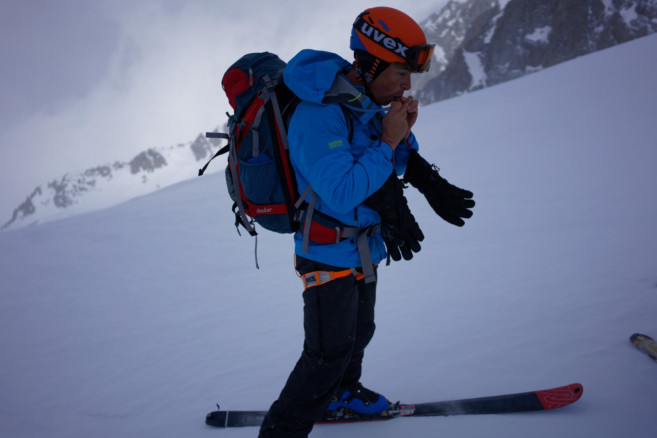
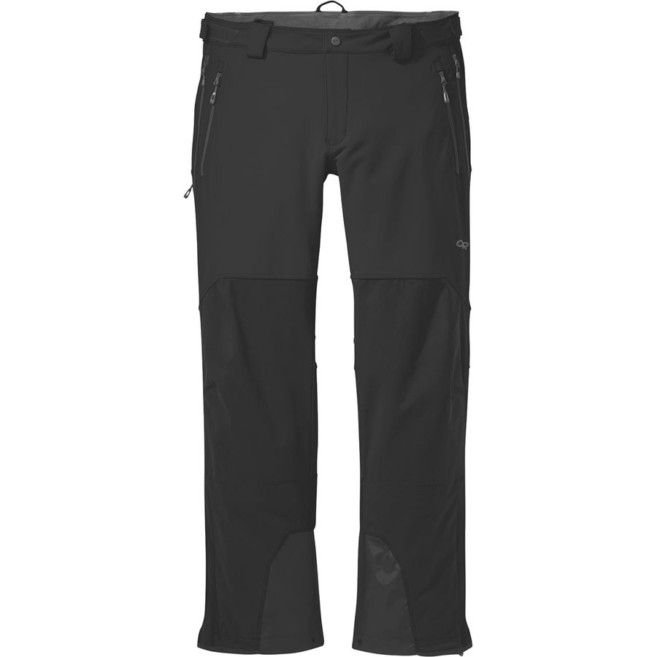
My Favorite touring pants of all time are the OR Trailbreaker pants II. They are simply amazing. All the ventilation zippers you could ever need, lightweight, and not too pricey. One of the best clothing items in my ski touring gear setup. They’re not waterproof, but Pertex in the right areas. In the helmet section picture, I’m wearing my OR jacket and pants if you need to see the look!
If I were to look at another brand, I might take a look at the Black Diamond Dawn Patrol Ski Touring Pants, they look similar in terms of functionality.
Gloves for Ski Touring
Gloves or mittens depend on your preference, and for me how cold it is outside. I don’t go up with mittens, but I will sometimes have a warm dry pair in the pack to put on at a summit. The gloves have to have straps so I can hang them from the wrist on the up if I’m getting warm.
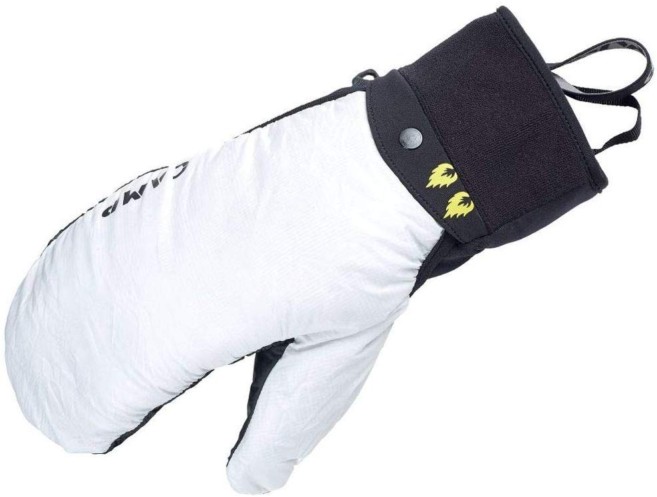
For conditions that could get colder on the up I use the CAMP G Comp Warm Glove. Cool design on these, they’re a light glove, that hides an insulating mitten in the wrist area that you can warm up with.

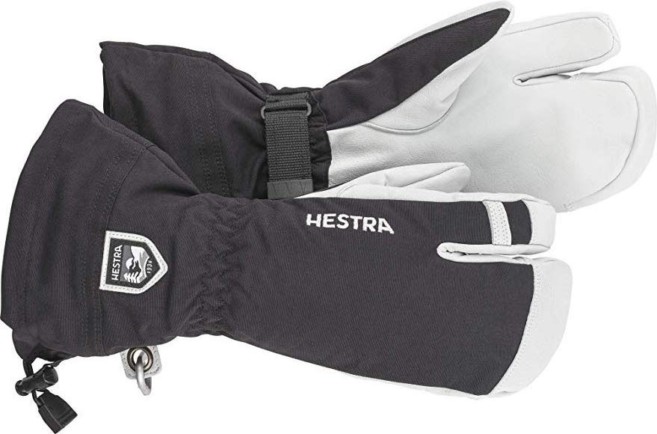
The one I throw in the pack, if I have the room, and I know it’s going to be cold is the Hestra Army Leather Heli Ski Glove – Classic 3-Finger Snow Glove.
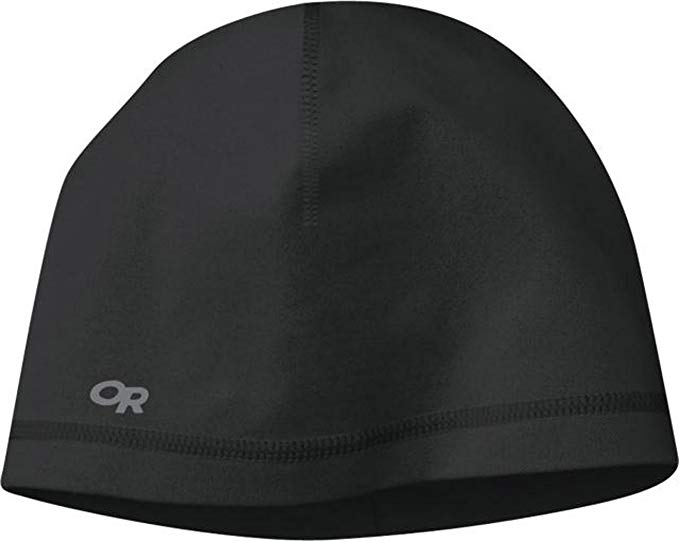
Hats
I usually have a north face Polartec hat that I will start with, an old favorite that they don’t make anymore. It’s easy to pull off and stuff in a pocket without stopping.
Another great cap is the Outdoor Research Novo Watch Cap. It’s a thin pullover cap hat that helps wick away the sweat and is easy to put in a pocket.
Backpack
You can use any backpack, but a dedicated skiing pack is much better. Things that I look for are:
- Dedicated separate storage area for your snow gear so not all your stuff gets wet
- A tie-down system that lets you comfortably carry skis or boards for steep climbs
- Quick access storage areas, and
- Hydration pack compatible (for warmer touring)
You need the right volume for the kind of touring you’re doing. Small day tours, less volume, maybe 30L, up to 40L tops. Week-long tours of 45 lb sacks need much more volume, up to 65L+. It needs to be sized properly for your body, and the suspension carry system needs to be comfortable.
My current backpack is the Deuter Rise 34+ backpack. It offers excellent comfort with space for all of my daily ski touring gear.
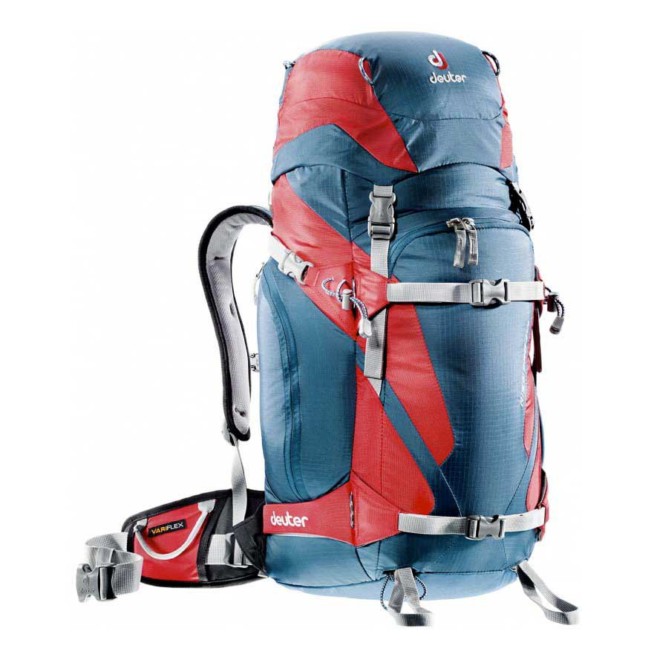
It’s a multi-day pack – probably a bit big for day tours, but I often will use it for those. It’s comfortable, opens up easily, and has a dedicated storage area for all my snow tools. The + means you have a top area that can expand for even more room. It is hydration bladder compatible, and there’s a net option for my helmet which I do use a bunch. I also have a rain cover for those messy day tours.
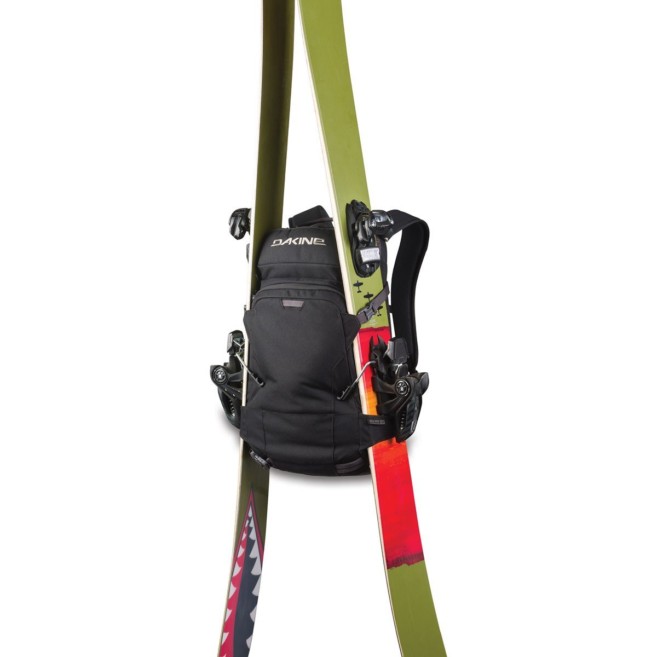
I also have an older Dakine Heli Pro 20L that I use inbounds when I want my avalanche gear and want to do some quick sidecountry jaunts. There’s also a 24L version. I’d recommend the Dakine for the quick tours where you can be a minimalist.
Things to Take in Your Pack
Be prepared. Somethings you put in are obvious – shovel, probe, beacon. Some are not. I’m sure I’m missing some things I take along, but here are the main ones in no particular order. This list is for day tours, other things go in for those long tours where you’re required to carry bedding/stoves/food.
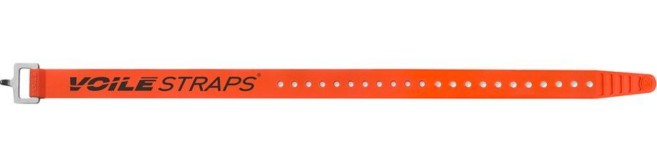
Carry Straps
I always pack 2 Voile rubber straps. My size of choice is the one that is 25”, its range is 9” to 25”. I use these to hold my skis together when carrying on my pack, and it’s a great safety item if something breaks, boot buckle, who knows…
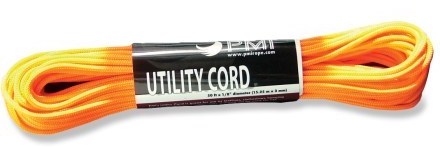
I always carry some paracord, some of which I use to cut out, knot and use for Extended Column Tests. Worth having in your pack for other quick fixes and emergencies.
Water System
Gotta have some water as part of your essential ski touring gear. Be careful with hydration systems, since these will freeze in cold weather – not good. But you do need plenty of water. An insulated container is worth it for touring. Something from Hydroflask or Yeti would work great. Or use your trusted Nalgene with an insulator sleeve.
Snacks
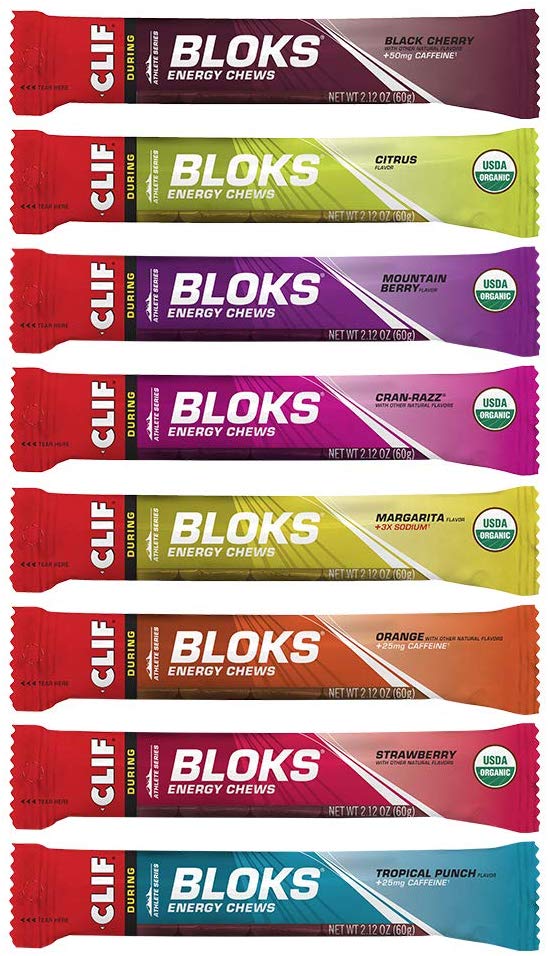
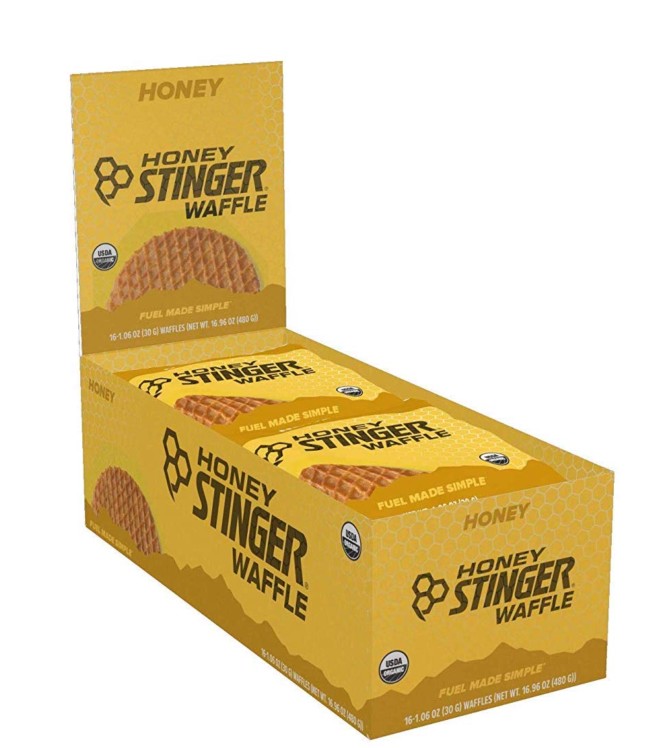
I really enjoy a quick bite when I reach a goal, I’m just in that reward mode. I have two go-to snacks, to get me going, and keep me going. CLIF Bar – BLOKS energy chews in a variety pack. I don’t chew them, I see how long I can make one last, and I definitely like the ones with more caffeine! My only other snack, that I’ll usually down as a treat at the top, is a Honey Stinger Organic Waffle cookie. These are basically like the famous Dutch Stroopwafel cookies
External Battery
I always have my cell phone. There may not be coverage, but I do use it for tracking GPS, and mapping, pictures, and video, and running Gaia GPS. You should have a real compass, and a real map of your area also.
Either way, a backup battery is always necessary for me as GPS tracking eats phone batteries. The main battery I will take for the day is the Anker 10000 mAh at 180 gms. It goes in my backpack, with a quality charging cable that slithers out to my phone in my chest pocket for quick access.
On a multi-day tour, a larger capacity may be worth it if you can haul it. I know this weighs a bunch at 490gms, but this battery power source has enough power to keep a phone charged for days – the Anker 26800 mAh. It’s a beast.
Satellite Communication Device
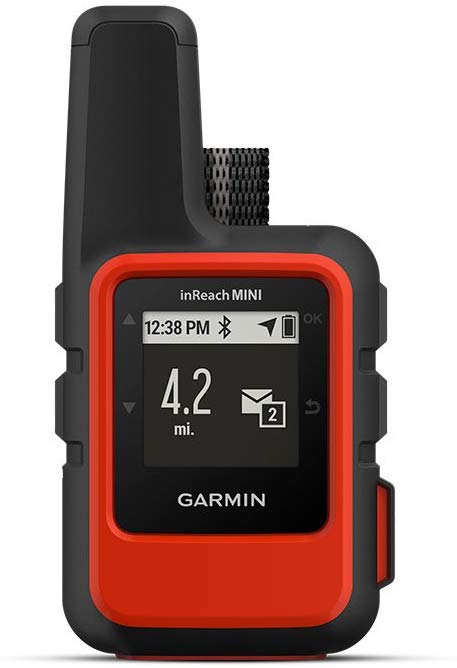
For being super safe from a communications perspective in the backcountry, you should have a portable Satellite device. Prices on these have come down a lot, and you can get one with a monthly plan turned on only when you need it. The one I carry is the Garmin InReach Mini. You definitely need to practice with it before really needing it, but it is a good feeling to have this with you on a trip.
Additional Communications
Why, you ask, do you need walkie talkies…why…? You need to communicate with your group quickly and efficiently, and sometimes yelling won’t work. On a windy winter day, yelling may not be heard, nor would a communication device in their backpack. But if your partner had a speaker near their ear, and you had a mic conveniently located, you might give them an extra second or two to react to any emergency notifications you may be trying to convey. This is a piece of ski touring gear that could save a life.
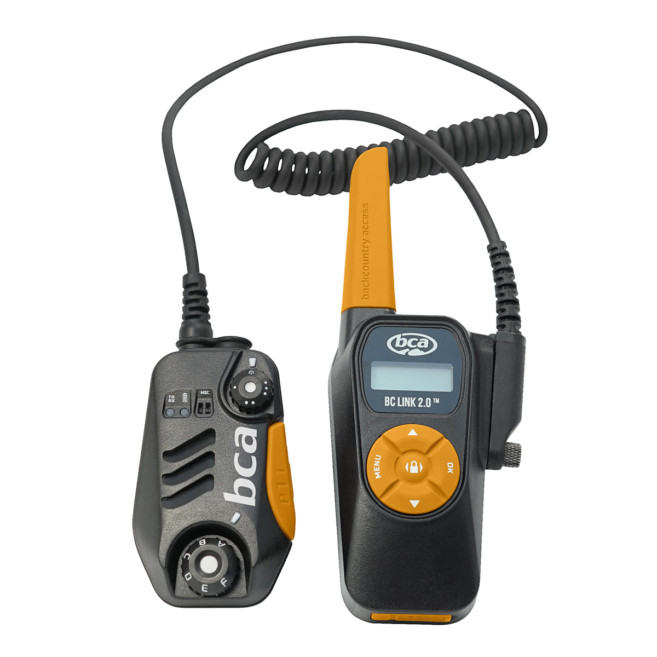
Such a device exists in the Back Country Access BC Link radio system.The main walkie talkie goes in backpack (batteries stay warmer), mic/speaker clips to shoulder strap. They don’t have a lot of power (2 watts), they are line of sight devices communicating over FRS (Family Radio Service). At $120 they’re a lot more than a regular walkie talkie, but the design is still well suited for the requirements.
Whistle
What…a whistle? Yep, this definitely fits in the additional communications category. You want a loud one that is strapped on the front of your jacket. This way you can blow it quickly if say you fall into a tree well and need to get someone’s attention. A nice, loud one that I use is the Fox 40 Sonik Blast CMG. It comes with a breakaway Lanyard, produces a 102 dB sound level, and is pea-less, so nothing can freeze up. Buy them in a two-pack, for you and your ski partner! It’s a simple, small piece of gear that could get you out of a bad situation while ski touring.

Headlamp
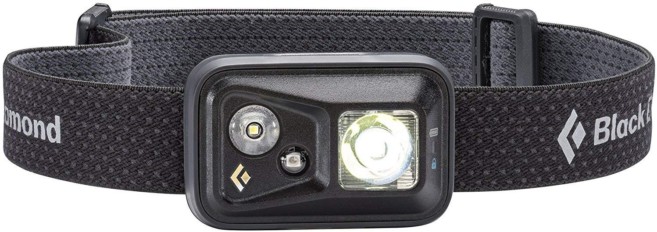
My headlamp of choice is the Black Diamond Spot. What’s not to like! It’s $30, puts out 300 lumens at max output, it’s great. Put it in for short treks in case you get delayed, and need that extra light.
First Aid
I have basic bandaids and blister protection for day treks, but for multi-day trips, things get more complicated. Taking a Wilderness first aid class is worth it if you have the time and desire. Some Duct Tape and super glue can also be useful. You can do a lot with these! Super glue can be used to seal knife-like cuts that are clean, not deep or jagged ones though. A good first aid kit is a must, Wildsnow has a great article on their thinking on this subject.
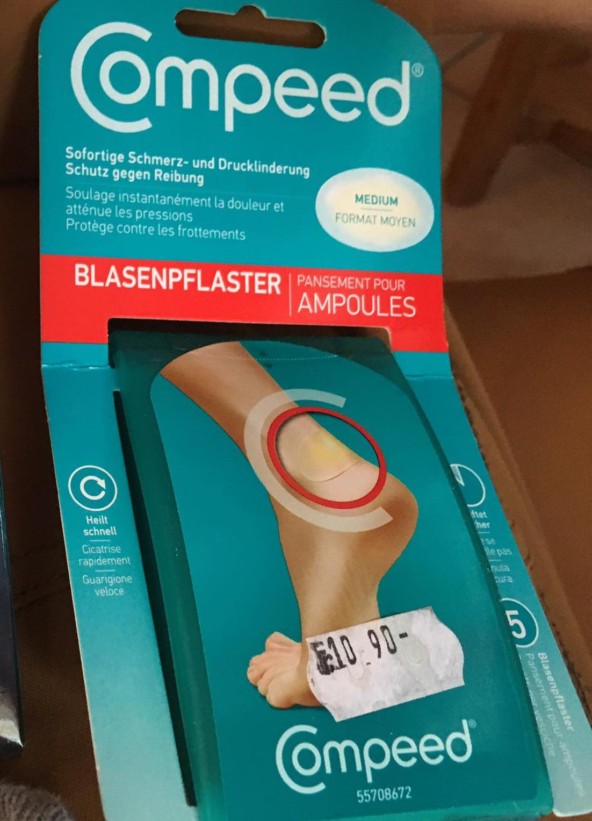
It’s inevitable, someone, and it could be you, will get blisters. And it will be on their heels. I’ve seen horrible, horrible heel blisters on long tours. I never, never go without my Compeed Blister Pads, I swear by them. No other brand competes (compeeds?) in my opinion. As soon as someone feels a hotspot, put it on right away. Stop in the snow, take the boot off, and put it on!
Camera Gear
Do you really need any extra camera gear – considering that most people have their phone with them? For me, the answer is usually yes. I enjoy documenting and sharing my adventures with others, and cameras allow me and the team at Voyage and Venture to do that.
The best camera is the one that’s with you, and the phones today are amazing. 4k60 video, optical image stabilization, and multiple lenses are just the start. A few quick stories on my efforts to bring gear on treks: In 1984 (when phone cameras weren’t around) I lugged a Canon AE1 and lens on the Haute Route ski tour. In 2017, again on the Haute Route Trek, I carried a DJI magic pro and 3 batteries. Sure, add another brick in my backpack!

Here’s what I sometimes take on ski tours:
- iPhone 11 Pro – its always with me, shoots 4k60, and night shots are now great!
- Sony A7R2 – with nice lenses. Full Frame makes a difference!
- GoPro Hero 8 – gotta catch the action!
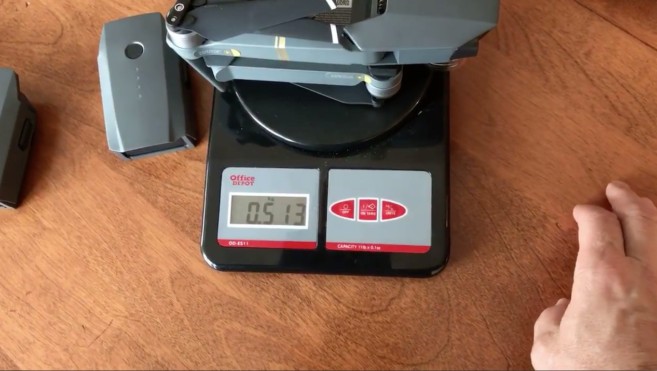
- DJI Mavic Pro – only worth carrying on clear days in my opion.
Gear for Intensive Tours
hat kind of trip will this be? Scrambling over steep peaks, ski touring over glaciers, walking on icy terrain? Any of these will lead you to need more mountaineering oriented gear than a typical day tour. If your backcountry skiing tour is guided, the guide operation will know what you need and usually have rental options. Here’s some gear you might need on your tours depending on conditions.
Ice Axe
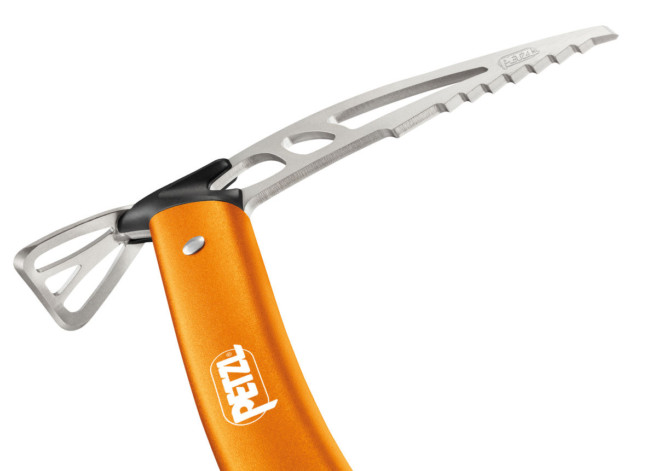
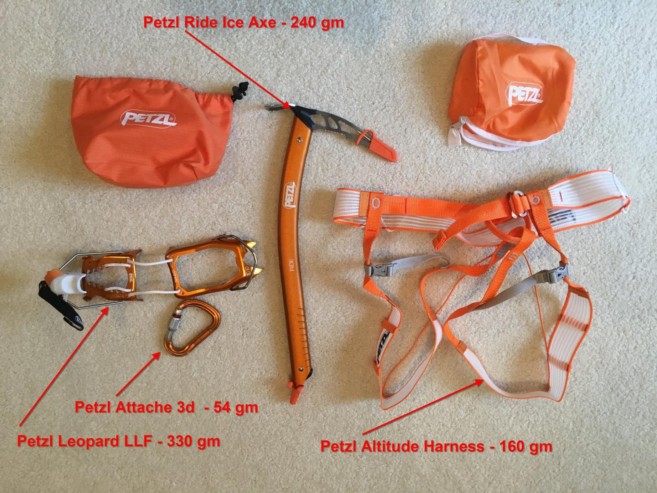
Climbing steep pitches will sometimes require an ice axe. My ice axe is the Petzl Ride, again designed for ski touring, aluminum shaft and steel head, super lightweight at 240 gm. I don’t think there’s a better one for ski touring.
Crampons
If you’re climbing steep pitches or on icier terrain where you need that extra grip that your Vibram ski boot soles won’t give you, you need crampons. For crampons, steel is considered the best, it won’t wear down, especially on rocky terrain, but it is much heavier. On the Haute Route, you can get by with Aluminum, and that was my choice. My crampons are the Petzl Leopard 11f aluminum crampons. Designed for snow touring, they weigh in at 330 gm for the pair. In comparison, an all-metal pair like the popular Grivel G12 weigh-in it 970 gm, but you would then have no issues on solid ice and rocks.

Harness, Carabiner, Rope
If you’re going across glacier terrain, then you’ll need to have harnesses, carabiners, and rope. Petzl does have the best lightweight ski mountaineering choices, so I’ll let you know what to get. For Carabiners, The Petzl Attache. A classic screw lock carabiner, and it’s got the “red dead” color code to help you out.
With regards to harnesses, the Petzl Altitude harness. It’s super light, and it’s super well designed, and you can put it on easily with ski boots on!
When it comes to rope designed for this purpose, I’d recommend the magical Dymeema or the Petzl Radline 6, at 22 gm/meter.
You’d think I was sponsored by Petzl – but no, no affiliation! There are lots of other products in this domain, this is where my research led me. I did think for a bit about a hybrid crampon, steel toe claws, aluminum back, but in the end, said no. I did add the plates from Petzl to prevent snow buildup, and the puncture-resistant Petzl Cord-Tec bag to keep my crampons from making rips in my gear! To reduce more pointy bits I also have the Petzl Ride Pick and Spike protector.
Winter Camping Backcountry Ski Tours
You need a lot more gear if you’re camping out on a winter ski tour. Some of these items are also needed on some hut to hut tours. What you bring depends on your mode of transportation. If you’re lugging it all in on your backpacks, it better be light and compact. If you’re snowmobiling into a base camp, and can tow a sled, things change quite a bit – it’s almost car camping!
Stove Options
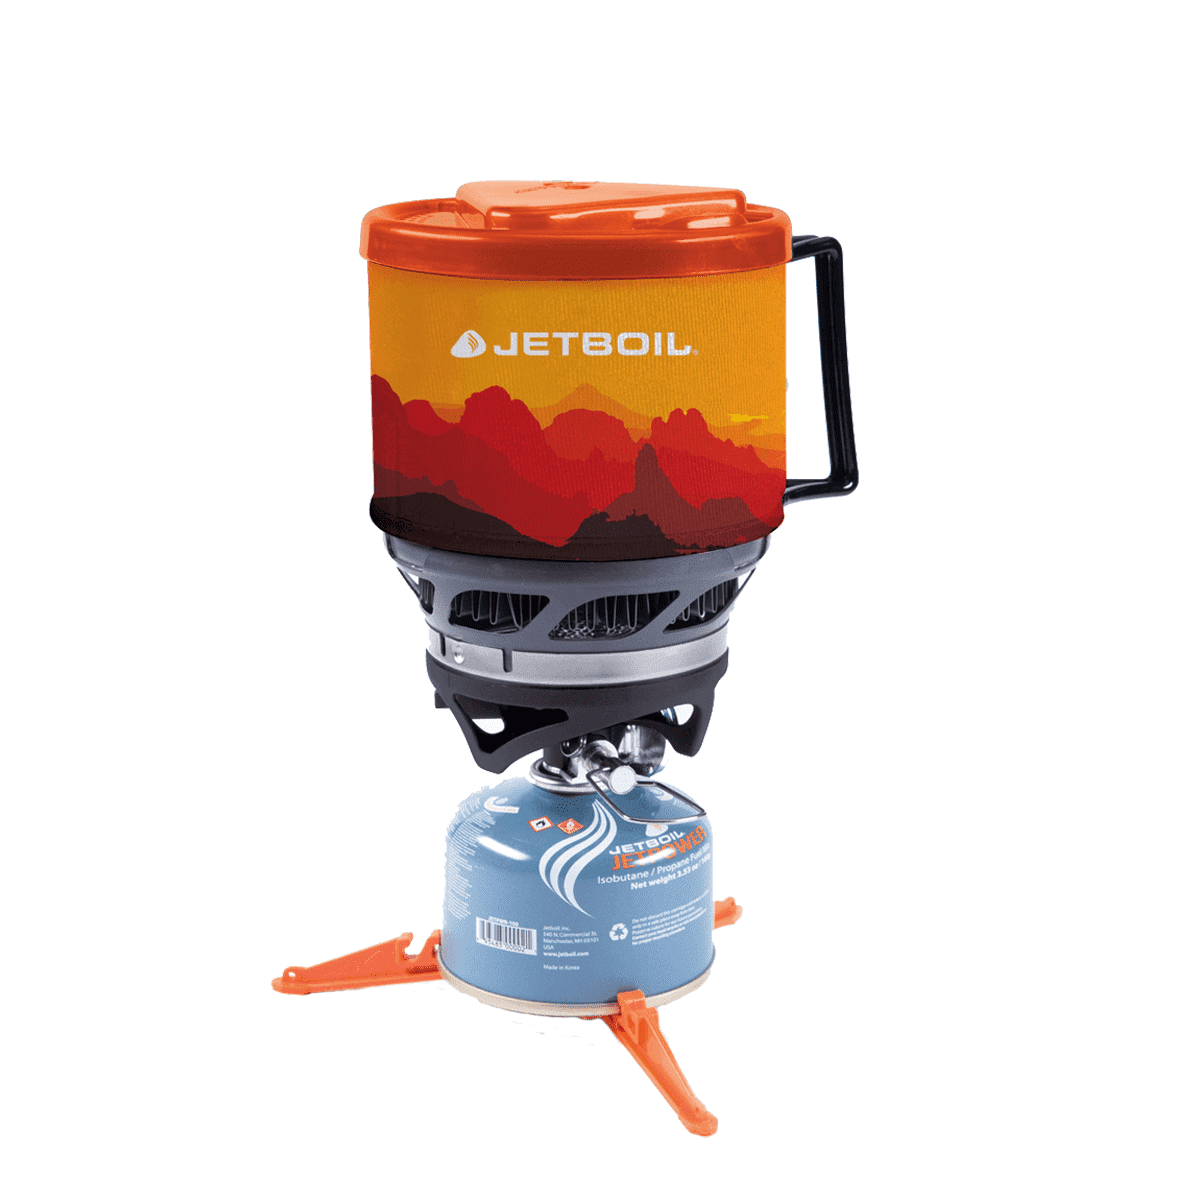
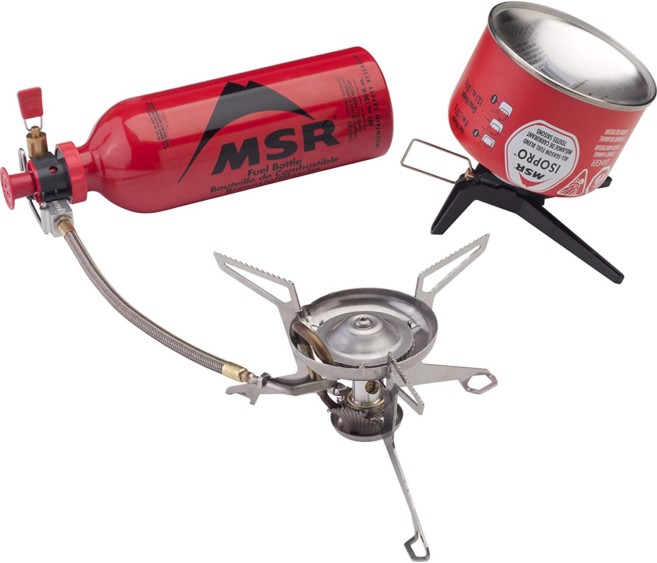
If you’re not cooking over a campfire, you need a stove and a winter-specific one at that. Oh, but you will need something to cook it on… a stove. The Jetboil Minimo is a great one, but higher altitudes and cold weather could impact performance since canisters can depressurize and produce a weak flame.
In this case, the alternative is something like the MSR Whisperlite Universal cook system. In warm weather use the easy to work with canister. But in cold and altitude, switch to Liquid fuel – Win-Win! Add to this the 2-liter titanium MSR Big Titan Kettle (170 gm, if you have the room), for 2 people, or the MSR Titan at .85 liters (118 gm) and you are set.
Food Options
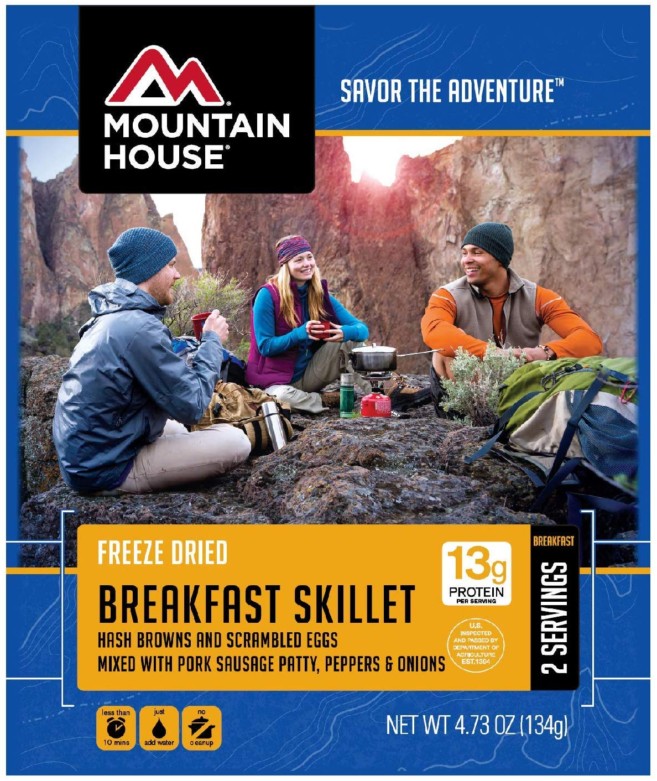
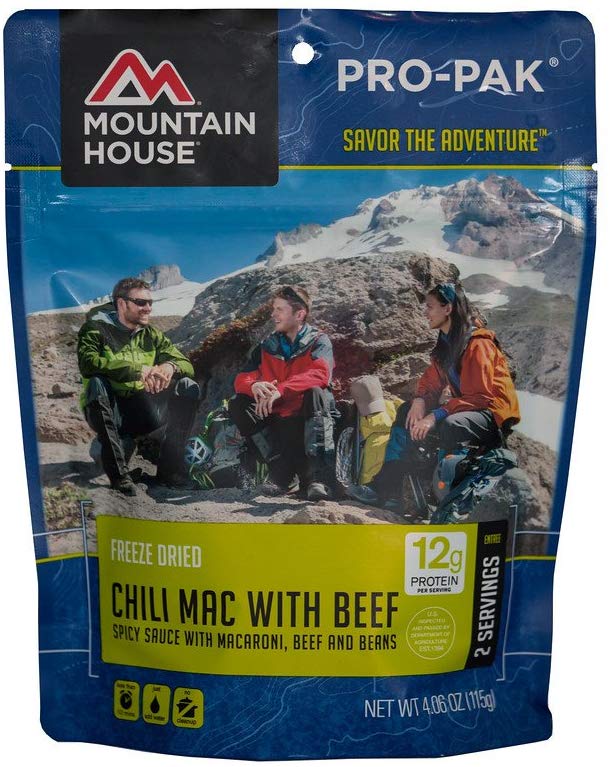
If you’re on an overnighter and food isn’t supplied, you’ll need some good freeze-dried food. Most food from Mountain House is a good pick, like this Chili Mac with beef (136 gms). For breakfast, the Mountain House Skillet is not bad either. It’s lightweight, just mix with boiling water, and it tastes good after a long day. Tried and true oatmeal in a packet is also good and easy in the morning.
Tent Options
All my experience with winter camping is using a 3 season tent. The tried and true, reasonably priced, REI Halfdome 2 tent, in which I’ve spent many a cold night. It’s not light at 5 pounds 5 oz, but if you sleep 2 in it, and split the load, now you’re at a bit more than say 2 lbs 10 oz per person. That’s a bit better.
The newer version of the tent is called the Half Dome 2 Plus. The vestibule is nice, but not a lot of storage for all your gear. Keep those vents open, or you’ll have more ice condensation on your inner walls than you’ll know what to do with.
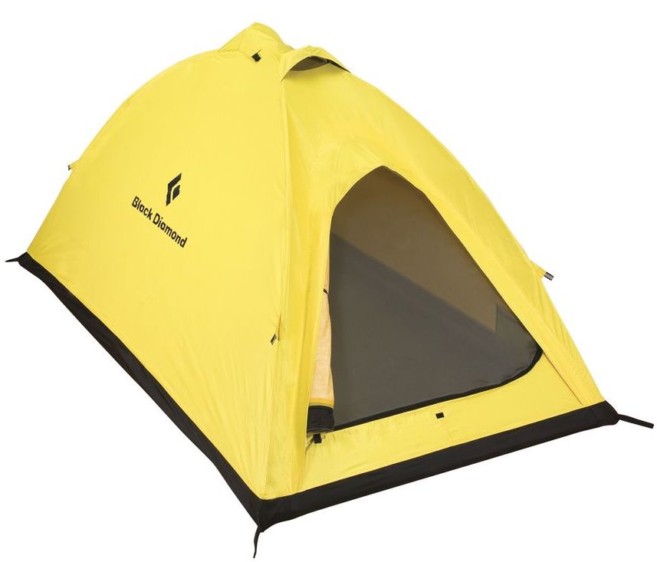
4 season tents are a must for above treeline, and heavy snow load possibilities. There is not really any difference in warmth, it’s just the tent’s ability to deal with heavier loading. Black Diamond makes some killer winter tents, that are light and strong. This would be a great piece of ski touring gear when you’re out on multi-day tours.

You’ll need to either upgrade to some winter tent stakes like these (a bit heavy though). Or create a deadman setup by either burying your stakes in the snow or using buried sticks or other items you have available to you that the guy lines are tied to.
A tent that looks very appealing to me is a heated TIPI style tent. Not sure if you’ve seen these before. They’re popular with some hunters, they are floorless tents, with titanium wood-burning stoves. You can stand up in them, cook in them right on the stove. It’s like a portable yurt – sort of. The two big makers of these are Seek Outside and Kifaru. Here’s a neat article from Outside magazine on their thoughts. These are expensive, but a pretty cool concept for touring groups. As long as you keep the fire stoked, and taught well-staked guide ropes, you’ll be warm and cozy with your touring group, with room for your gear too.
Not sure I would set one of these up in an open area exposed to the wind though. A 12 man tipi tent from Seek Outside weighs about 12 pounds, the stove pipe is 22 oz, and the large titanium stove (that you can cook on) is 35 oz, all folded up. With this, you can sleep 6 people with a heated stove in place. Compare that to the weight of 3 tents, and cooking stoves, it’s not horrible. I wouldn’t carry that size tent in a pack, but in a sled behind a snowmobile would be pretty nice.
Another option is a Canvas walled shelter. Like those made by Snow Trekker Tents these large boxy tents breathe well, and can hold lots of people, the drawback is the weight. But again, if sledding in for a few days with a group, would be a great option. We’ll keep you posted if we do a winter adventure with a heated tent!

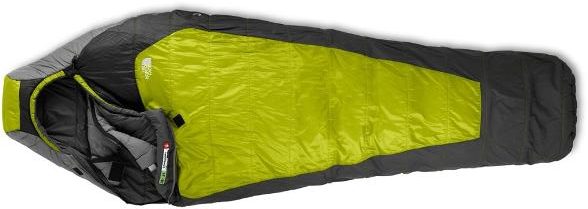
Sleeping Bags for Overnight Ski Touring Trips
A warm sleeping bag is another piece of gear you’ll need for winter camping ski touring trips. One thing to know about sleeping bags, for a long time there was no real standard for the temperature ratings. At least that changed a bit in 2017 with the new EN/ISO standards. Here’s an REI take on this. So be careful when you look at the name of a bag, you really need to know the tested comfort range, and what temperatures you might expect.
An example is my current sleeping bag, the older Northface Snowshoe +0 mummy bag. I’ve had it for a while, it’s a 0 degree rated bag, with synthetic fill, it’s served me well for many years. It’s tested comfort is 16 deg F. and I have been cold in it before. Synthetic is heavier than down, but if it gets wet I can deal with it better than down. I also use a RAB silk sleeping bag liner ( required on the Haute route trek by the huts). Mine doesn’t seem to be available anymore, but here’s one that’s similar. These will add a bit of warmth, maybe 5 degrees to your bag’s rating.
There is a huge range of sleeping bags on the market. You need to figure out what the lowest temperature point you might realistically be in is, and use that as your comfort zone point of reference.
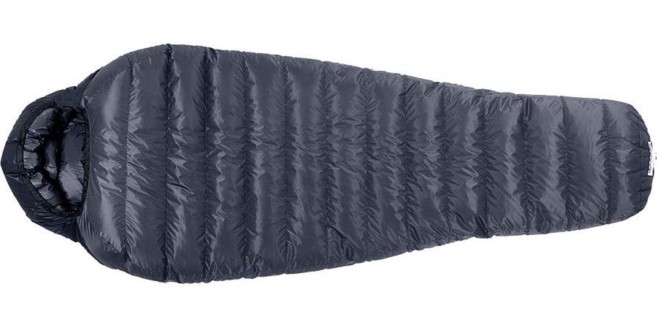
At the higher end of comfort and warmth, sleeping bags from Western Mountaineering get universally great reviews. Their Kodiak MF 0 deg bag is filled with 850 fill down, it’s made in the US, and reviews say their ratings are conservative. As with most high end down fill products, you’ll pay for this bag, around $700, and they also have a gore tex covered version for $835.
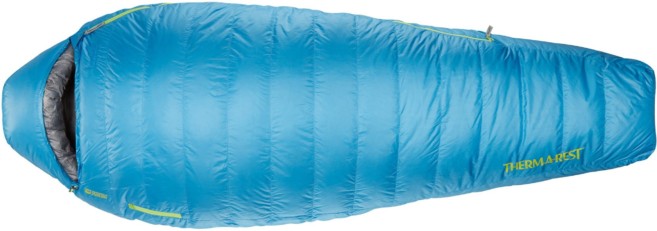
At a lower price point, you might look at the Therm-a-Rest Questar 0 degree down mummy bag. Priced at $350 is pretty reasonable, and it uses hydrophobic 650 fill down. Even though this says 0 degrees in its name, it’s comfort rating is actually 14 degrees, where you would be sort of neutral, I.e. not shivering while out on a ski touring trip. Here’s Thermarests take on the sleeping bag ratings.
Remember to fill a Nalgene sealed tight with boiling water before going to bed, and throw it down by your feet 10 minutes before hopping in. Make sure you’re using a change of clean dry clothes (no cotton), and don’t believe any articles about sleeping in your birthday suit in your bag, that’s just wrong!
Ground Pad
A warm sleeping bag is no good if you just set it on the ground. You will lose so much heat to the ground! You have to have an insulating layer between you and the ground.
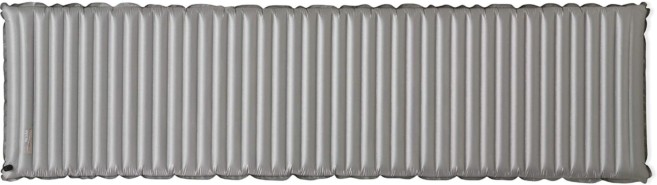
Invest in a good insulating sleeping pad, one with an R-value (a material’s resistance to heat flow) greater than 5. Your summer sleep pad won’t cut it at all. The one I use is the Thermarest NeoAir Xtreme MAX. It has an R-value of 5.7, is very light, but a bit crinkly noise-wise. The 77”x25”x2.5” version weighs a scant 23 oz. I think the extra room of the MAX is worth carrying over their mummy-shaped one. It also comes with an inflater bag, so no huffing and puffing!
If I’m heading out with a snowmobile and can carry more stuff, it would be cool to bring something like the Exed Mega Mat 10 to use at a base camp for several days. Everyone that writes about it loves it. The wide one is 77” x 30.3” x 3.9”. The R-value I see for it is 9.5, wow!! This would not be one for the backpack at almost 6 pounds, but you could use it for guests at your house too!!
One thing to note, R-values in pads are additive, so if you have an R3 and R2 pad, stack them together and now you have an R5 insulating system!
Additional clothing for Ski Touring Winter Camping
A few additional words on clothing in the sleeping bag. You don’t want any sweat or condensation on your body. Your clothing needs a wicking material that will keep pulling that away from your body. A good clean Capilene layer works great. Put a comfy cap on. Pull that hood from your mummy bag tight. If your bag is a bit big, stuff some dry clothing in to fill the big air pockets in your bag.
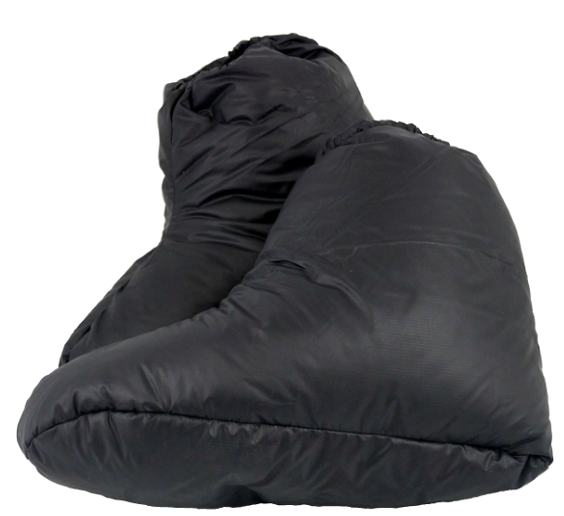
Let’s talk about feet. My feet get cold, and I do wear good clean socks. On real cold camping nights, I’ve even tried using my REI Down Camp slippers – my ankles were warm, but I lost heat through the bottom of the slippers. The solution I think is down socks, this is on my wish list for cold cold weather camping, the one everyone talks about is GooseFeetGear. They are also sold at ZapPacks, 850 fill treated down. These are not slippers, but socks to wear in the sleeping bag.
I hope that this article about the best touring skis and the ski touring gear that you need for the backcountry has been useful for you. If you found this blog interesting there are two other connected blogs you should look at:
Taking a Backcountry Ski & Board Trip – The Different Options Available
Backcountry Skiing – Know Before You Go – Preparing for Risk, and Route Planning Tools
Well, that’s a wrap on the gear you need for touring in the backcountry in the winter. We’re constantly updating this, so come back to see what’s new when you get a chance. I hope this helped, and get out there and have some fun!

About Jeff Meeker
Jeff is an avid skier, outdoorsman, and technology guru, who’s love for skiing is at the same level as his wife and two kids. His passion for skiing started age 3, when his Swiss mother made it a requirement that he know how to ski. He spent the winter of ‘84 working in a Swiss ski school near Verbier, which his daughter decided to replicate in 2017. Jeff spends his time between Northern Virginia, Switzerland, and Sandpoint Idaho. He has two home ski mountains, La Tzoumaz, Switzerland, and Schweitzer, Sandpoint, Idaho.
Andie Brazewell
Thursday 17th of September 2020
Fab infoblog Jeff,(and YouTube film that led me here!) great to see someone using and abusing their body to write good reviews and recommends for gear, much appreciated. Building up to the haute route after one of our challengers with CCTA did it a few years ago, if they can, so can I... Best regards, Andie Brazewell
jeff
Friday 18th of September 2020
Hi Andie, First, thanks for taking the time to comment, and glad you enjoyed. Congrats on training to do the haute-route, such an epic trip. Thanks! Jeff